Working with images: "cropping" images
(InDesign: go to the fourth interior page spread in the magazine to follow along with this example.)
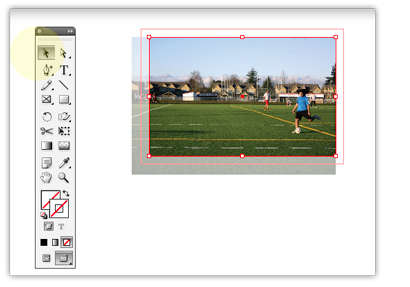
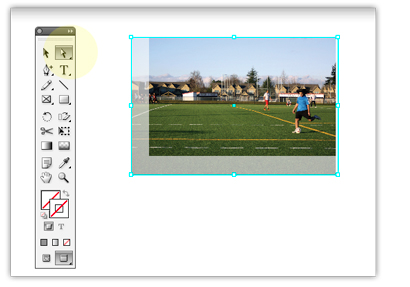
With InDesign, it's not necessary to physically crop images. Rather, it lets you create a frame that hides the outermost edges of the image. In the image at left, the red line around the image shows the virtual crop of the image selected; only the area inside the red lines will be visible. You can adjust the frame with the selection tool (black arrow) to any size, without affecting the size of the image itself. The cyan lines in the image above right show the actual dimensions of the entire image. (The screened area that is visible on the left and bottom edges of the photo is for the sake of this tutorial only, and not part of the final design.)
With the black arrow selected, you can double click on the image to activate it, and move it around within that text frame, without affecting the frame size. In this way you can show only the part of the image that you want to make visible, without permantently affecting the image. In the image above, the image needed to be small enough to accommodate the text in the article. So, rather than reducing the actual image size, only the parts of the image not necessary were "removed" and the size of the student kicking the the soccer ball didn't have to go any smaller.
If you need to re-size the image and the frame, click once (making sure the direct selection arrow has been previously selected) and hold down the SHIFT and COMMAND key to change the size of the image itself.
Next: Create a text wrap for your images and graphic elements.