Padlet, an Online “Bulletin Board” for Collaborative Class Projects

I am always interested in finding new instruments to use in student generated content projects.  Padlet is a device-neutral application that allows the displaying of information on any topic.  It can be used like a traditional bulletin board or for such activities as blogging, publishing podcasts or videos, bookmarking, making brochures and posters or as the base of a discussion board.   You can use Padlet as a publishing tool or just as a private notes app. This is a great application because it allows the collaboration of multiple people adding content to a padlet. Another nice touch is that work is autosaved as it is generated so work is not lost when students forget to save as can happen in some wikis.

You can choose who sees your padlets from the general public to just members of a class or even making your padlet completely private for your eyes only.  In a collaboration application, you determine the level of access by assigning individuals read only, read-write, moderator or administrative access.  Padlets can be collaborated on by a single class, multiple classes within the same institution or by classes at multiple institutions.  How fun would it be to have your class interact with experts via a padlet mechanism?  The uses for this app are endless.  Here is a link to an article on using Padlet for blogging in the classroom.

Some of the things you can include in a padlet are documents, images, hyperlinks, audio and video files. Files can be uploaded from a computer or mobile devices, and content from the web such as a YouTube video can be embedded into your padlet.  In turn, you can embed padlets into webpages, blogs or an LMS; export them as pdf files, images or a host of other files; or distribute them the old-fashioned way by printing them.

Padlet is available for use in a browser, and there are apps available for iOS, Android and Kindle devices.  There is a basic free padlet account available which allows you to have three operating padlets, however,  uploaded files must not be larger than 10 MB.  The basic plan is not a trial, but rather, an account that does not expire.  Padlet Pro is $8.25/month (or $99/year) with unlimited padlets and upload available for files up to 250 MB in size.  On the free plan, you can delete a padlet you no longer need to start a new one to keep within the three padlet limit.  For a collaborative project,  you can generate one padlet to be used by everyone in the class.    If you refer others who then sign up for a padlet account, you will be given an additional padlet for every three people who join from your referral.  If you are interested in signing up for a free account, you can help me out by using my referral link.

An Easy to Use App to Create e-Books

I have used a student-generated content project in my CH 361 Energy, Resources and the Environment class for quite a number of years.  In this class, we do not use a commercial textbook, but rather, students generate the e-textbook used.  This is done using a wiki platform.  The way the project works is that each class edits what has been previously written, updates the data and adds new sections.  Since the course is taught in alternating years, this keeps the textbook relatively current on a topic that is extremely fluid.  Although a wiki application works quite well for my purposes, it is a little limiting in the respect that the “book” is only available for reading online.

I am always looking for ways to improve the projects I use and found an app called Book Creator which allows you to add text, images, audio, and video to generate e-books.  Unlike applications such as i-Books Author, it is easy enough for anyone to use. It can be used by teachers to generate classroom resources, by students for creative projects or by anyone who wants to create an e-book. Here are some of the types of things this app could be used for:

  • instruction manuals
  • digital portfolios
  • lab notebooks
  • travel journals
  • textbooks
  • picture books
  • group creative writing books
  • the modern scrapbook
  • a recipe cookbook

I am sure there are a plethora of other applications for this app.  Although Book Creator was originally designed as an iPad app, it is now available as a web app as well.  When you are done creating your masterpiece, you can publish it for general distribution as an e-pub, an i-Book or a pdf document.  e-Pub is a universal format that can be read on any platform while i-Books are Apple specific.  The pdf is universal, but if the book has audio or video clips, they will not be incorporated into the final published form and would need to be made available to your audience through the web or other distribution mechanism.

Book Creator allows a teacher to generate a library that contains up to 40 books for free.  There are paid accounts that allow multiple libraries and larger numbers of books, but for many classroom applications, the free account is sufficient.  You do not have to be an actual teacher to sign up for an account and generate e-books.  Students can have individual accounts, but I haven’t explored that feature.  I am going to have students use this app in their capstone laboratory experience course next year for generating electronic laboratory notebooks.

You can learn more about Book Creator at  https://bookcreator.com/

Introducing Students (or Anyone Else) to Power Searching With Google

Remember the days when you spent hours in the library looking through dusty books taking notes on 3 x 5 cards? If you were a chemistry student, you used the dreaded volumes of Chemical Abstracts which required knowledge of how to use a series of different paper indexes and whose tomes took up entire sections of floors of libraries. Although today’s students are used to “googling” everything, most just type sentences or a few keywords into the search box to find information. Google has many search tools that allow the researcher to conduct efficient searches that can target results from reputable and scholarly sources.

I have put together a web resource for use by my upper division students (although it could be used by students at any level as well as non students) that introduces them to a variety of tools allowing them to target specific types of information. The site is freely available for anyone to use for themselves or their students.  You might even find some tools with which you were unfamiliar!

My iPad Love Affair

When Steve Jobs took the stage on January 27, 2010 announcing the “revolutionary” iPad, I thought why in the world would I need a supersized iPod Touch?  Of course, I Vector-iPad_thumbdidn’t… but, got mine the very first day.  It was indeed a magical device which quickly made me wonder how I had lived my life without one.  I have upgraded several times since that day.  I carry a retina mini with me everywhere and have an iPad Air 2.  I use them primarily as information consumption devices for reading, web surfing and video, but do use them for some productivity activities such as note taking, spreadsheet calculations, managing class Moodle sites, editing pdfs and minor writing when on the go.  I must say I do love my iPads!

For a long time, there were rumors that Apple was going to produce a large screen iPad.  I wondered why would I want a steroidal iPad to tote around?  I have a mini because I don’t want to pack around the standard size iPad.  This was one Apple i-device that I did not even consider pre-ordering before it launched.

I teach several courses that are either predominantly or completely online offerings; all have significant writing components, and the students in these classes turn in their work as pdf documents.  During the grading process, I want to be able to scribble comments, corrections, make little drawings, etc on the documents for returning to the students. This is especially important because the students in an online class are often unable to come to my office to discuss their work with me.  I can edit pdf documents on a computer by inserting comment boxes and highlighting the writing, but it never is as clear and efficient as being able to mark up the work with a pen.  My workflow in the past has been to print each pdf, mark it up, scan it and return it to the student by email or some other method.  This has killed many a tree and resulted in carting around a messenger bag crammed full of paper.  So the problem to be solved is how to effectively give feedback to students while saving trees (important to someone like me who teaches environmental courses.)

The solution?  An iPad Pro coupled with the Apple pencil!  The pencil is the game changer here, but, unfortunately, it only works with the Pro and not other iPads. With ipadpro_pencil-hand-printthe pencil, I can write on the screen just like writing on paper (truly you can!)  It is legible, at least as legible as my handwriting is.  I can change up colors of “ink” which when combined with highlighting and striking out words does exactly what I would do with paper documents.  When I am done, I can upload the corrected documents to the students via my Moodle shell.  No trees have been killed, only some electrons rearranged!

Here is my workflow:  I download the student pdf documents into a Dropbox folder and open them in PDFpen for IOS from Smile Software.  I append a pdf of the scoring rubric to the end of each document (sometimes I already have done this using PDFpen Pro on my Mac) and then proceed to annotate them with the pencil.  After syncing with Dropbox, I upload the graded documents into the Moodle shell for students to pick up.  Can I say this is magical?

The iPad Pro is a monster.  It is big.  It is heavy, and it is certainly expensive.  You are not going to put this thing in your pocket, and you get tired when trying to hold it up in portrait mode.   Actually, it probably isn’t much different in weight than an original iPad, but it is much more unwieldy.  It is fine to use on a desk or table, and the screen real estate does have its advantages.  With the ability to split the screen between two apps in IOS 9, you can work with two documents side by side which can be very useful.  You can see an entire written page very nicely in portrait mode.  I hope Apple will make pencil use available on the next iteration of the iPad Air as that would be a great form-function pair.

I can foresee some additional productivity use cases for the iPad Pro.  Although I have never envisioned using an iPad as a computer replacement because I need to work with software that is not available on a tablet, I do foresee being able to leave my 15″ Macbook Pro home while traveling when I don’t need access to such applications.  The screen size is great for word processing, and Microsoft has done a nice job with the Office apps for the iPad (assuming you have an Office 365 subscription). I am sure I will find other uses that take advantage of the pencil and sweet screen.

If you think you might have a use for this device, go to an Apple Store and play with one using the pencil before you buy it.  This is not going to be something everyone, or even many people, are going to need.  I didn’t want one, but it solves a big deal problem in my life so I have to say I have rekindled my love affair with the iPad!


Free Countdown Timers for Classroom Applications

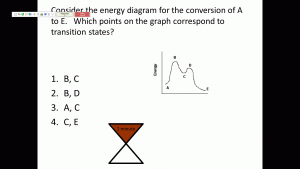
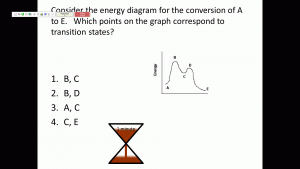
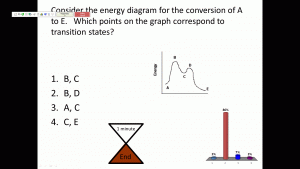
In my flipped organic chemistry class, active learning is encouraged by asking questions and posing problems for students to solve (see my post “Enough with the Lecturing“.)  To foster engagement, students record their answers using student response devices, “clickers”.  As an aside, I, unfortunately, have found that a grade needs to be assigned to their work for them to take it seriously.  Most of the time, the questions require the students to work out the solutions.  They are allowed to use anything at their disposal to arrive at a solution including notes, textbook, collaboration with other students, etc.  In these cases, students are given amounts of time to work out the answers commensurate with the difficulty of the problem.  lightning_roundHowever, on occasion, we have what is called a “lightning round” in which objective questions which should not require any in depth discussion or complicated reasoning to answer are asked.  These questions must be answered individually with no aids as if they were quiz questions.  During the lightning round, the students are typically allotted 30 seconds to one minute to log their responses depending on how long it should take an average student to read the question and possible answers.  To ensure that I do not close the polling  too quickly, or leave it open too long, I add countdown timers to each question slide.  One of the timers I like is a little hour glass “animation” that empties just like an old fashioned egg timer.  When the “sand” has all gone from the top to the bottom, I close the polling.  The images below show the timer at the start, a midpoint, and at the end.

countdown screen shot countdown screen shot2 countdown screen shot3

These timers are part of a package containting a variety of different styles designed by David Foord.  All are free for use in educational or non-commercial applications.  If you have a use for countdown timers that work in Power Point, you can download them from A6 Training.


An Unusual Way to Present Introductory Information on a PowerPoint Slide

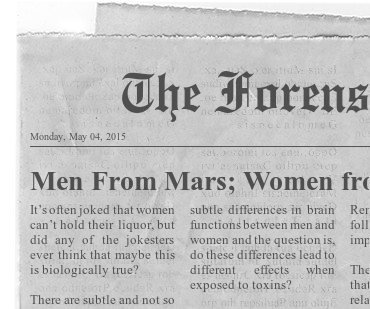
Sometimes an interesting opening slide can get your audience’s attention.  There is a website that will generate a “newspaper clipping” that can be used to create an unusual introductory type of slide.  All you have to do to generate a clipping like the sample one I’ve added Sample_Newspaper_graphicis go to the newspaper clipping generator and type in a fictional name for your newspaper, a date, a story title and some copy.  The site will generate a jpg graphic file that you download to your computer and insert as a picture on your slide.  I just grabbed something from one of my chemistry students senior seminar abstracts to make this sample graphic.  The entire process took about a minute.  This is not something that should be overused, but I thought it might be an interesting way to present introductory material….and yes, your audience is going to read it, but it could be part of what you are saying in your introduction.  Clicking the link above will take you to the graphic generator.

How to Use “Animation” to Spice Up A Classroom PowerPoint Slide.

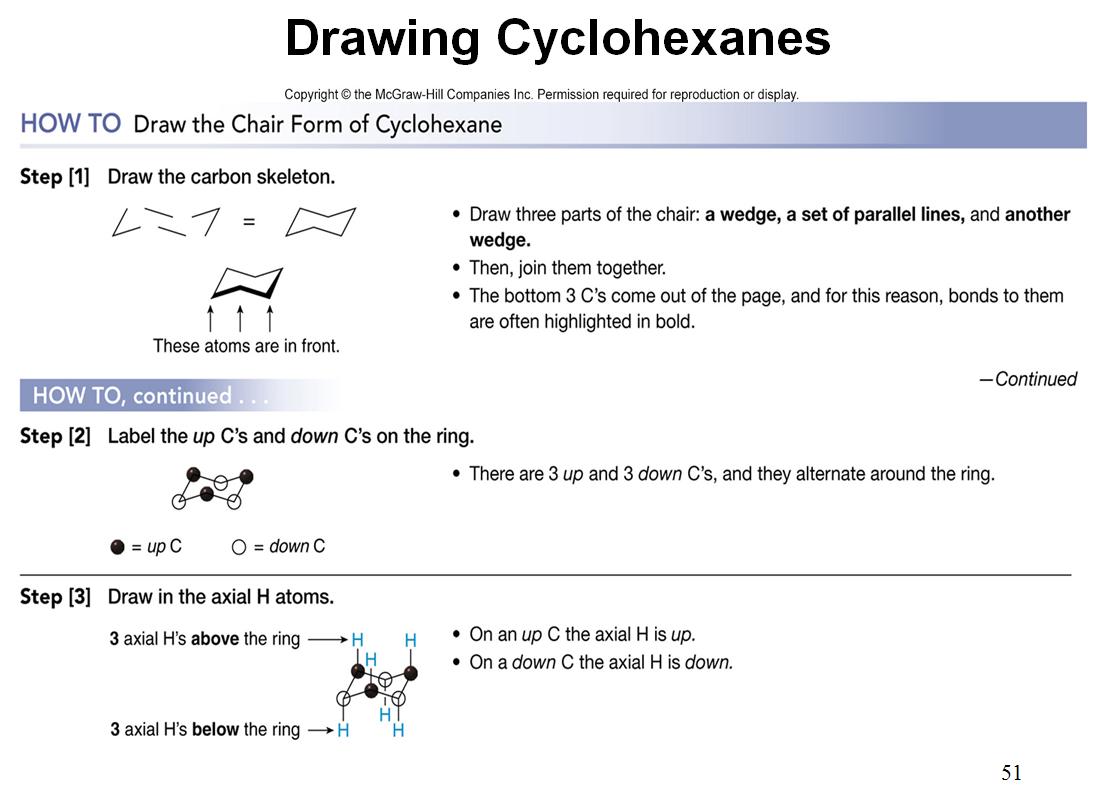
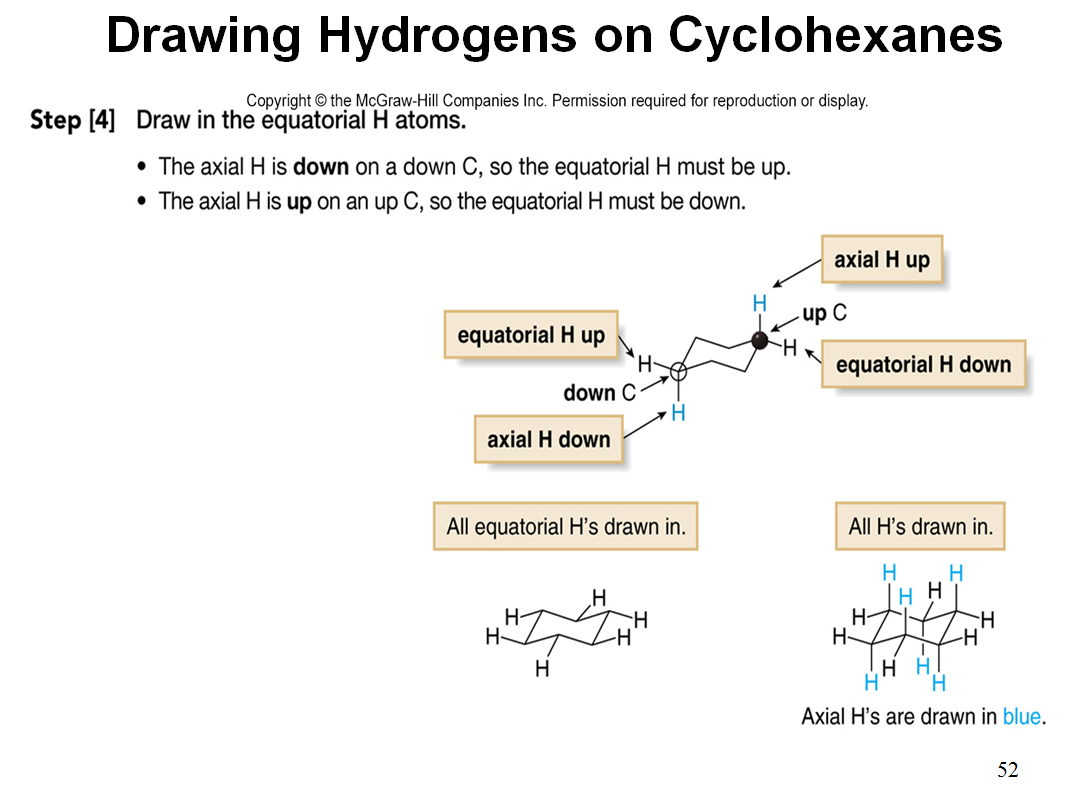
PowerPoint presentations are frequently referred to as “death by PowerPoint” because often the slides are crammed with paragraphs of words or lists of bullet points.  The slides that come with textbooks are often perfect examples of what I believe should not be used in a classroom lecture.   For example, here are the two consecutive presentation slides that come with the text that I use in my organic chemistry class.  They are a copy of a figure from the text book outlining how one draws the chair form of a cyclohexane ring.

cyclohexane1

cyclohexane2These are not horrible slides, but they show too much information all at once.  It is human nature for us to read everything that appears on a slide rather than listen to what the presenter is saying.

It is very easy to make an “animation” that gets across the same information without having an overwhelming amount of information projected on the screen at all times.  Here is a short video that I have made showing how this same information can be imparted using very simple techniques in PowerPoint.

Obviously, in the classroom, we work our way through the information in a step-wise manner over a period of several minutes. Here I am just quickly clicking through the two slides.  In the lecture, the students have been given a handout onto which they physically draw the chair form of cyclohexane as we progress through the “animation”. Drawing the cyclohexane chair may seem like an easy thing for students to do, but traditionally, mine do not seem to be able to make intelligible drawings without some guidance!  While working our way through the “animation”, everything on the figure from the text is incorporated into the discussion plus we look at physical “ball and stick” models allowing the students to relate their drawing on paper to the three dimensional molecule.

Making this more interactive visual was not very difficult.  If I can make something graphic, anyone can as I have little artistic talent!  All that was required was to insert lines, boxes or circles using the shapes on PowerPoint’s drawing toolbar and then tell them when and how to appear and disappear using the animation toolbar and animation pane.  Although it takes more time to make slides like this compared to just typing a list of bulleted items or using a stock figure from a text book, it is far more interesting and attention holding for  your audience.  With small bits of information appearing on the screen, students are less likely to quickly read what is on the screen and go back to their social activities like texting, tweeting, etc.

Most people tend to remember pictures better than paragraphs of words so I try to incorporate pictures as much as possible on my slides and use words somewhat sparingly so they have more impact when they do appear.  If you want to give students more information, you can always provide them with a lecture outline or make presenter notes to share.


Using Video Documentary Creation in the Science Classroom

A number of my classes have a significant project-based learning (PBL) component.  All of my classes are upper division Chemistry courses except for one, General Science, a liberal arts core course for students in the University’s Honors Program.  I team with an Earth Science colleague to teach the third term of this year long sequence course.  The students in our class are not science majors, rather, most are majoring in the arts, humanities, social sciences or education.  photographerWhile we teach some physics, chemistry, earth and environmental science through the topic of energy and energy resources, much of the students’ in depth learning comes from researching an energy topic of current interest and creating a video documentary about it.  The documentaries are used for class learning and are also presented in a public screening during Western Oregon University’s Academic Excellence Showcase. The project is a rather daunting one for our students as we are on the 10-week instructional quarter system, and in reality, they only have about 6 weeks from the time they start their research until the date of the Showcase event.  We have found over six years of using this instructional approach that production pairs work most effectively. There just is not enough time for single students to complete the work while larger groups invariably result in unequal divisions of labor.

Video production is writing in disguise, a term paper on steroids if you will.  Whereas a term paper is a very individual assignment written by a student and typically only shared with an instructor, the videos are writing shared with many people.  The project has a number of stages, and each provides students with the opportunity to learn some academically useful skills and improve their collaboration skills.  The stages are:

  1. Research
  2. Script Writing/Storyboarding
  3. Audio Recording
  4. Video Editing
  5. Proceedings Abstract Writing
  6. Presentation

Research

The research portion of the project is very similar to what a student does for a typical term paper.  However, during this phase, students are not just learning about their topics and collecting references.  They are also looking for imagery and video clips that they might be able to use.  We use this stage to teach about copyright and the Creative Commons.  If the students find non-Creative Commons pictures or video clips they would like to use, they learn how to seek the permission of the copyright holders to incorporate the materials into their projects.  We also provide a library of video clips we have recorded for them to use and royalty free materials.  Another skill we teach is how to locate scientific information and how to determine the validity of what they find.

Since this is a collaboration between two students, we provide them with a shared folder on the university network for storing files.  We have developed a class wiki site (hosted by PBworks), and each production team has a group of pages for storing research, composing their abstracts and developing the documentary storyboard.  The wiki serves two purposes.  It allows both members of the production team to add and edit materials (also members of other teams can drop anything they find that might be of use onto another team’s wiki space), and it allows the instructors to monitor each team’s progress to ensure they are keeping on schedule and make comments and suggestions.

Storyboarding

Once the students have gotten a significant amount of their research done, they develop a storyboard for the project.  For our purposes, a storyboard consists of a two column table with rows for each of the “scenes” in the video.  One column contains notations of the visual materials that will be on the video track, and the second column contains the audio (narration, music, sound effects) that will accompany those visuals on the audio track.  This is where the students write their narration script.   All of this is done on the wiki so we can read the scripts as they develop.

Recording the Narration

Once the script is written, students record their narration.  We use Audacity, a free audio recording software package, available for both Wiindows and Mac which does not have a huge learning curve.

Video Editing

Once the narrative recording is completed, it is laid down as the audio track to start the video editing process.  The visual track is then constructed with still graphics, video clips, transitions, titles, etc.  We use Adobe Premiere Elements, available in both Windows and Mac editions, as our video editing software. This software is quite powerful for a consumer software package and does have a learning curve.  To get the students up and running, I have created a web module with screencast tutorials of all the basic features needed to create a video.  Early in the term, we familiarize the students with the software by having them create a short 1-2 minute video clip with an audio track (learning Audacity), video from stock visuals (although they can opt to shoot their own), transitions and titles.  We devote several class/lab sessions to the actual video editing of the documentary project so I can trouble shoot and help with technical aspects.

Proceedings Abstracts

Western Oregon University allocates one day each spring (typically the Thursday after Memorial Day) for students to present academic work in a professional meeting environment which is open to all segments of the university community as well as the public at large.  This is the forum through which our senior Chemistry majors present their seminars, and the students in our General Science class show their videos.  A Proceedings with abstracts of all the presentations is published for the event.  The unfortunate part of the abstract writing exercise is that the deadline for abstract submission occurs before the students have completed their narrative due to the time frame needed to compile and print the abstract volume.  We teach about abstract writing, the students collaboratively write their abstracts within the wiki, and then we do group editing during a class session.

Presentation

When the Academic Excellence Showcase day comes, the students are present for the public screening of their videos.  Each pair of producers sit in directors chairs at the front of the auditorium and introduce their video, tell why they chose their topic and share something interesting that they learned during the research process.  After the videos are shown, they entertain questions from the audience.  This process can be a bit daunting to our students who are often freshman and sophomores as the lecture hall in which the screenings occur is often filled to standing room capacity (70 or more).

Miscellaneous Comments

We do devote a lot of class time to these projects so you may wonder how we cover the course content.  The theory behind project-based learning is that students learn more about a subject if they develop their own knowledge through an in depth study of a particular topical area than by a traditional overview of a subject.  Our students learn from their own research topic as well as from the range of topics covered in their classmates videos.  The members of the class watch and critique the other students videos multiple times, and the material from these topics is queried on the final exam.  During the term, we do cover basic physics, chemistry and earth science concepts as well as topics not explored in a given year’s video productions.  Much of the course content is delivered using a flipped classroom style methodology where students watch video lectures and complete web modules I have generated, watch videos on alternative energy topics, watch videos from previous years classes, read articles on energy innovations, conduct hands-on lab exercises, etc. We have conducted surveys of our students over the years we have been teaching this class, and the majority of the students rate their class experience favorably.  Some reoccuring themes we see in the surveys are that the students were afraid of the project because they came into the class with few of the technological skills needed for making a video; the students liked taking responsibility for their own learning; they were proud of what they accomplished and would recommend the class to others.  I am old fashioned… I believe that self-esteem and confidence comes from tackling challenges, learning from mistakes, and ultimately accomplishing a goal.  Our students, who are not going to be scientists and may even be “afraid” of science, leave our class confident that they can research a scientific topic and learn what they need to know to be an informed citizen.  This is my goal for these students!

Six years ago, Philip Wade, whose specialization is Earth Science education, and I undertook this as an investigation to see how alternative learning experiences can be used in the university classroom, and we are very pleased with the results.  It takes much more effort to teach the class in this manner than if we used a traditional lecture approach.  We have presented our findings via poster and oral presentations at several meetings of the American Geophysical Union (AGU) and were invited to write a chapter, “Using Video Projects in the Science Classroom”, in the monograph New Trends in Earth Science Outreach and Engagement, Advances in Natural and Technological Hazards Research published (December 2013) by Springer based on one of our oral presentations.  In addition, a number of our student videos have been selected each of the last two years for showing along side commercial productions as part of the AGU Cinema held during the AGU fall meeting in San Francisco.  We plan to submit entries this summer from this year’s class for consideration for next December’s Cinema.

It is true that our students’ videos are not technically perfect.  There is just not sufficient time to mix the audio and to get the levels even throughout the production and to fix other imperfections.  Oh, what I would give for a 15-week semester course!  We give our students freedom to tell their stories however they wish.  While most use a “Ken Burns” style, we have had students write a play and do the acting, write their own music , make their own models, etc.  I am surprised we haven’t seen a “rap” version yet…we do encourage them to be creative! Here are some examples of this year’s videos (note that each video begins with about 10 seconds of a leader so the video does not begin abruptly at the screening).  I’d love to see any comments or suggestions you have.

Coal

An excellent student effort


Cracking the Case on Fracking

This is an interesting way of telling a story.  It was “performed” and filmed by the two students.  The background image is a tree trunk section showing the growth rings in case you are wondering.


The Ocean: Energy in Waves

This one contains some very nice imagery


Black Gold – Texas Tea

A well done look at petroleum


One Man’s Trash is Another Man’s Fuel

This video takes you to an energy generating facility not far from the university’s campus

“Enough with the Lecturing”

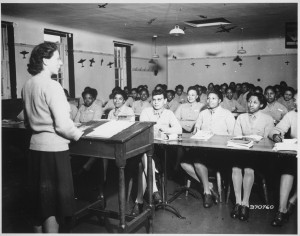
Enough with the Lecturing” is the title  of a May 12, 2014 press release from the National Science Foundation (NSF) which summarizes the results of a meta-analysis study testing the hypothesis that lecturing maximizes learning and course performance in the STEM (science, technology, engineering and mathematics) classroom.  -U.S._Army_nurses_are_taking_notes_during_a_lectureThe study was conducted by members of the Department of Biology at the University of Washington and School of Biology and Ecology at the University of Maine.  A paper describing it entitled “Active learning increases student performance in science, engineering and mathematics” appears in the May 12 Early Edition of Proceedings of the National Academy of Sciences.

So what is the problem to be solved?  In 2012 the PCAST (President’s Council of Advisors on Science and Technology) STEM Undergraduate Working Group reported that less than 40% of U.S. students who enter universities with an interest in STEM programs earn a STEM degree.  This percentage drops to 20% for underrepresented minority students…not a pretty picture…

In their report, PCAST called for a 33% increase in the number of STEM bachelor’s degrees completed annually, and one of their recommendations to reach this goal was the adoption of empirically validated teaching practices in the first two years of the STEM undergraduate curriculum.  The report goes on to state:  “Classroom approaches that engage students in “active learning” improve retention of information and critical thinking skills, compared with a sole reliance on lecturing, and increase persistence of students in STEM majors.”

Those of us in academia have titles such as lecturer or professor (one who professes!)  These titles are in keeping with the traditional mode of instruction in universities which has utilized an instructor-focused “teaching by telling” philosophy. In contrast, in an active learning environment, teachers facilitate the process of students constructing their own understanding often through asking questions.  The main question Freeman et al. asks in this study is: “In the STEM classroom, should we ask or should we tell?”

The project involved the meta-analysis of the data from 225 published and unpublished studies which documented student performance in courses employing some active learning versus the traditional lecture methodology.   Meta-analysis is a technique commonly used in fields such as medicine for determining the effectiveness of a particular treatment based on studies with a variety of patient groups, providers and methods of administering the therapy or drugs.  Freeman et.al.’s analysis focused on two questions: (1) does active learning boost exam scores and (2) does active learning lower failure rates?

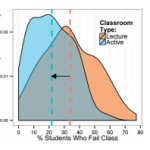
The study found that students in active learning environments showed an average increase in exam and other assessment scores of 6%.  What was even more interesting to me was the difference in failure rate between the two teaching approaches.  While no method can save every student, the authors  found a 21.8% failure rate in the active learning classroom versus 33.8% with the traditional lecture approach. failure_rate In other words, students were found to be 1.5 times more likely to fail in the lecture style classroom.  The study indicated that students in all sizes of classes benefitted from active learning.  There also were no significant differences in the effect of active learning between courses for STEM majors and nonmajors.

The authors conclude: “Although traditional lecturing has dominated undergraduate instruction for most of a millenium and continues to have strong advocates, current evidence suggests that a constructivist ‘ask, don’t tell’ approach may lead to strong increases in student performance — amplifying recent calls from policy makers and researchers to support faculty who are transforming their undergraduate STEM courses.”

I have been using a flipped classroom instructional approach in my organic chemistry course.  My students watch short video presentations outside of class (typically 15-25 minutes in length) on the topics that will be covered in the next class.  In the classroom, questions concerning the material are presented which the students answer using student response devices (clickers).  Most of the questions require the students to work out the answers by figuring out how the electrons flow; work through multistep syntheses; or apply what they know to systems different than what they have previously seen.  It does sometimes get a little loud as students debate and help each other come up with answers.  After everyone has selected an answer, we work our way as a group through the thought processes needed to arrive at the correct answer.   Although I do not have enough data to make any statistically valid conclusions, I have seen an improved retention across the three terms of the course since moving to the flipped classroom.  So far I can’t say that I am seeing more students earning A’s, but I have seen decreased numbers of D’s, F’s and dropouts.  Only time will tell if this trend is a permanent one.

Writing this post brought back memories of an all-but-forgotten educational experience I had many years ago.  As a new graduate student at Texas A&M University in 1975, I was offered the opportunity to increase my TA stipend by $25 a month (which then was a significant amount!) if I took a course offered by Dr. Glenn R. Johnson of the then Department of Educational Curriculum and Development.  Of course I, and a number of other Chemistry grad students, jumped at the opportunity. The Chemistry Department was hoping to make us better at our teaching duties, but we just wanted to eat better!   Dr. Johnson’s philosophy was that a significant amount of instruction in the classroom should be in the form of questioning.  As part of the course, we had to teach a number of short, videotaped lessons in our field of expertise using different types of questions.  Of course, we all jumped through the hoops to get through the class, but I doubt if any of us took the educational philosophy seriously.  After all, all of our role models had taught us using the lecture tradition, and we hadn’t turned out so badly had we?  I actually got an A in the class, received my $25/month increase, earned a Ph.D. and have spent 32 years as a professor.  It is amazing that while I had all but forgotten about that experience, I am doing exactly what Dr. Johnson tried to get us to do…teach by asking questions!

Animating a PowerPoint Table

What happens when you put a table on the screen while giving a presentation?  First, everyone starts reading it rather than listening to what you have to say.  If the table contains a lot of data, some people just zone out.  Even if the table is well designed and not off-putting, your punch line is there for all to see so why do they need to pay attention to what you have to say?

So how can you use tables more effectively?  I think one way to improve the use of tables in a presentation is to animate them so that only the bits on the screen that are being revealed are directly related to what you are saying.  Simple right?  Well, not quite if you have designed your table in PowerPoint.  You cannot directly animate a PowerPoint table, but there is a work around.  Unfortunately, if you are using PowerPoint for Mac, I haven’t found a way to use this trick.

Here is a little tutorial I have put together describing how to animate a table you have created in PowerPoint 2010.  I generated this tutorial using Clarify and was able to export the tutorial directly to Word Press using the Clarify 2 public beta which was pretty neat.  I am assuming you already know how to use the basic animation features of PowerPoint.


I would suggest that you duplicate the slide you are going to work on before beginning the animation process just in case fate is against you!

Step 1. Make a copy of your table.

Select the table you want to animate, copy it to the clipboard and delete the original table.

Step 2.  Reinsert the table from the clipboard.

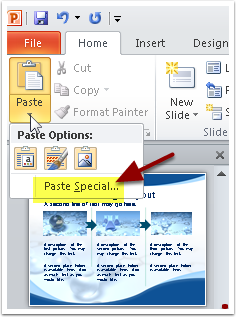
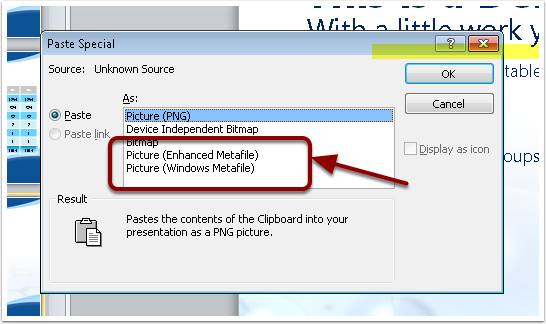
Paste the table back to the slide using the “Paste Special” function choosing the Picture (Enhanced Metafile) or Picture (Windows Metafile) option.

Step 2.  Reinsert the table from the clipboard.

 At this point you have converted your table into a picture that you will be able to modify.

Step 3.  Ungroup the various table entries.

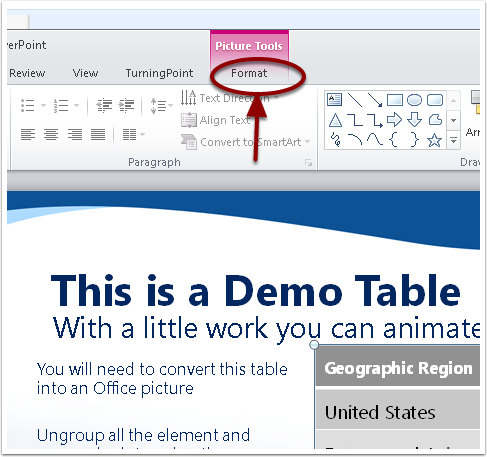
When the table is selected, you will see a new menu called the Picture Tools Menu.  Click on Format.  There will be a menu item, “Group” on the menu ribbon that appears.

Step 3.  Ungroup the various table entries.


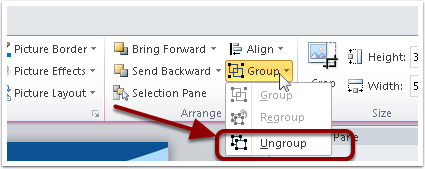
Open the dropdown menu and select “ungroup”.  This will bring up a dialog box informing you that the item is an imported picture.  Choose “yes” to convert your picture into an Office drawing object and redo the ungroup action.


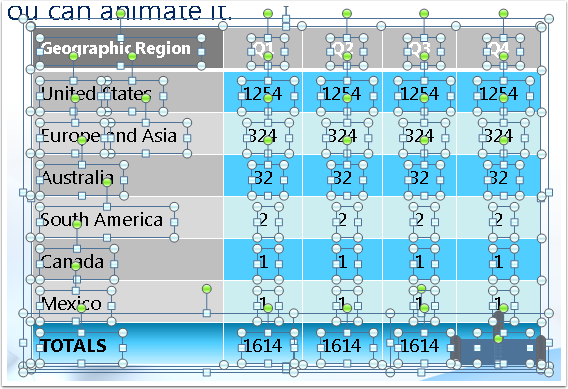
After doing this, you will see that all of the table entries are now separate items that can be used in an animation scheme.

Step 4.  Preparing a row for animating

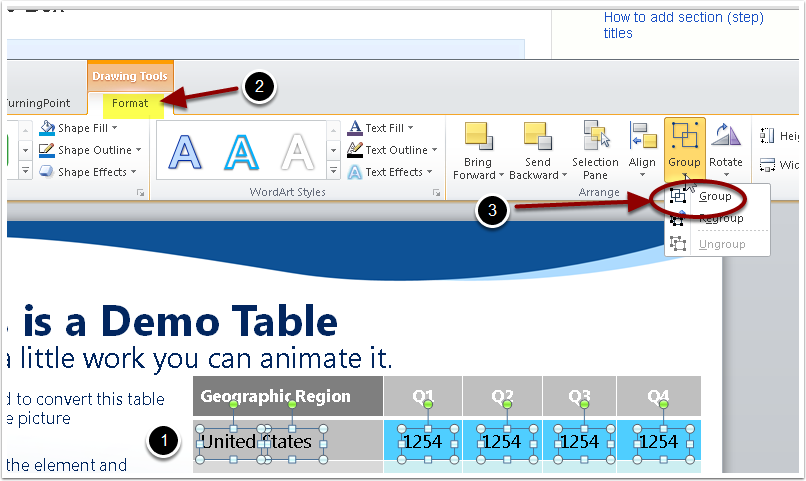
First click outside the table to unselect all the entries.  To make the United States row appear on a single mouse click, group all the column entries for that row together.  This is done by holding down the shift key while clicking each column entry you wish to include.  Open the Drawing Tools Format menu and choose “group”.  Then repeat this process for each row of the table.

Step 4.  Preparing a row for animating

Step 5. Animate the table

From the Animation Menu, open the Animation Pane.  To animate the United States row, select the row group and choose the manner in which you want the group to enter, for example, “Appear”.

Step 5. Animate the table

 Repeat the process for each succeeding row.

Step 6.  Test the Animation

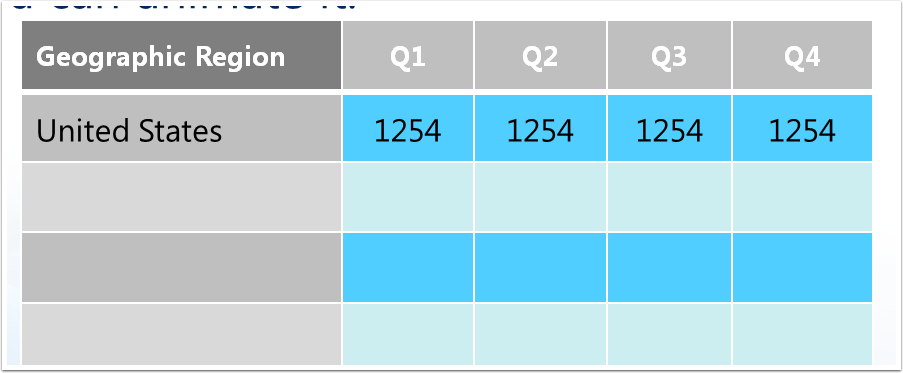
Here is the reveal of the first row.

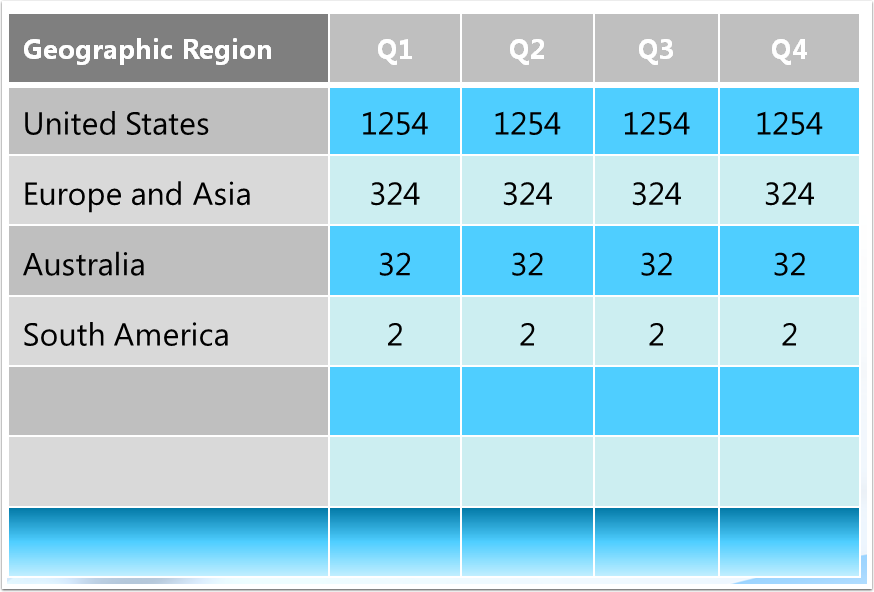
 After a few more mouse clicks, the table looks like this:

 You can group items in your table to reveal data in any manner that you would like.  That is all there is to it!