How to Use “Animation” to Spice Up A Classroom PowerPoint Slide.

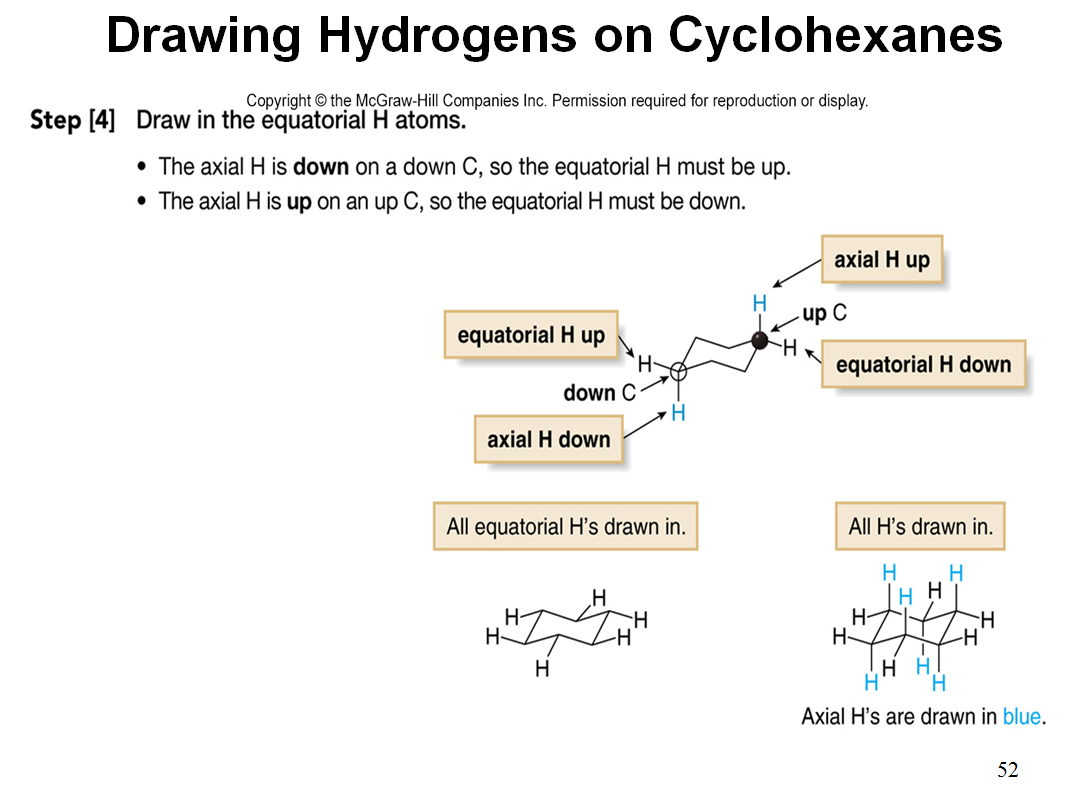
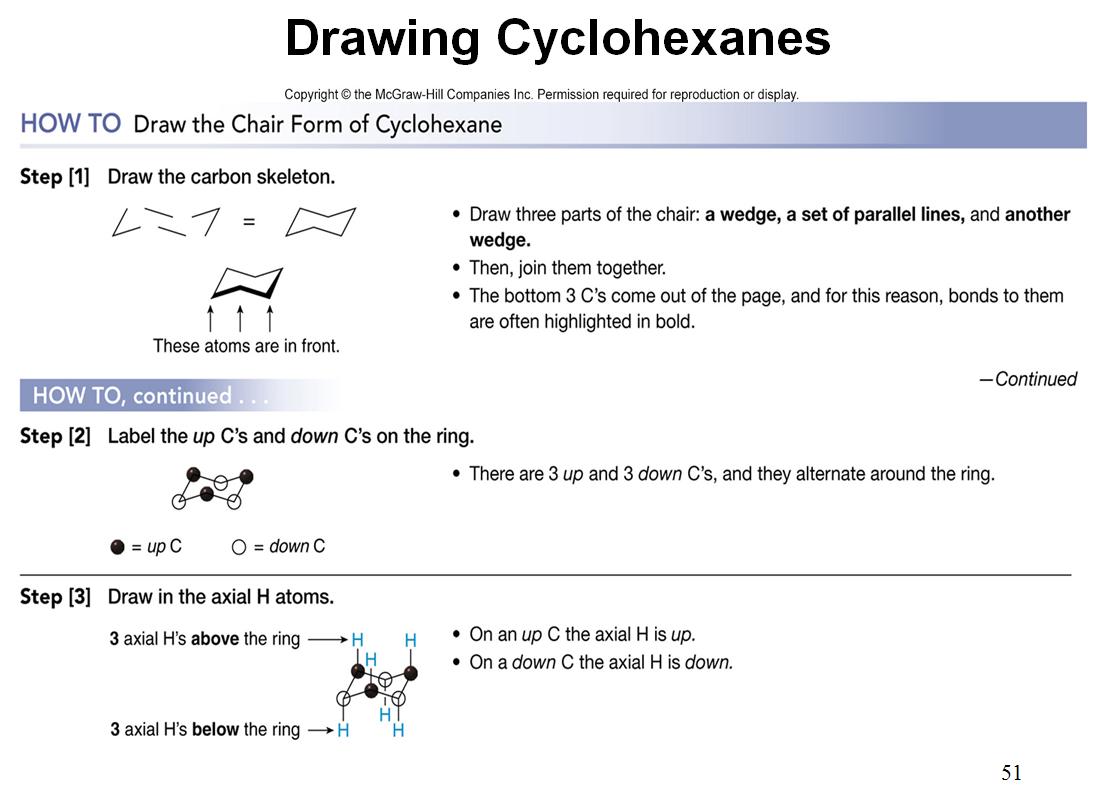
PowerPoint presentations are frequently referred to as “death by PowerPoint” because often the slides are crammed with paragraphs of words or lists of bullet points.  The slides that come with textbooks are often perfect examples of what I believe should not be used in a classroom lecture.   For example, here are the two consecutive presentation slides that come with the text that I use in my organic chemistry class.  They are a copy of a figure from the text book outlining how one draws the chair form of a cyclohexane ring.
cyclohexane1

cyclohexane2These are not horrible slides, but they show too much information all at once.  It is human nature for us to read everything that appears on a slide rather than listen to what the presenter is saying.

It is very easy to make an “animation” that gets across the same information without having an overwhelming amount of information projected on the screen at all times.  Here is a short video that I have made showing how this same information can be imparted using very simple techniques in PowerPoint.

Obviously, in the classroom, we work our way through the information in a step-wise manner over a period of several minutes. Here I am just quickly clicking through the two slides.  In the lecture, the students have been given a handout onto which they physically draw the chair form of cyclohexane as we progress through the “animation”. Drawing the cyclohexane chair may seem like an easy thing for students to do, but traditionally, mine do not seem to be able to make intelligible drawings without some guidance!  While working our way through the “animation”, everything on the figure from the text is incorporated into the discussion plus we look at physical “ball and stick” models allowing the students to relate their drawing on paper to the three dimensional molecule.

Making this more interactive visual was not very difficult.  If I can make something graphic, anyone can as I have little artistic talent!  All that was required was to insert lines, boxes or circles using the shapes on PowerPoint’s drawing toolbar and then tell them when and how to appear and disappear using the animation toolbar and animation pane.  Although it takes more time to make slides like this compared to just typing a list of bulleted items or using a stock figure from a text book, it is far more interesting and attention holding for  your audience.  With small bits of information appearing on the screen, students are less likely to quickly read what is on the screen and go back to their social activities like texting, tweeting, etc.

Most people tend to remember pictures better than paragraphs of words so I try to incorporate pictures as much as possible on my slides and use words somewhat sparingly so they have more impact when they do appear.  If you want to give students more information, you can always provide them with a lecture outline or make presenter notes to share.



Do You Ever Wish You Didn’t Need to Type the Same Thing Over and Over Again? Here’s Your Ticket!

Do you ever repeatedly type your name, certain phrases or terminologies, or write a lot of similar email responses?  If you do, tame those beasts with a text expansion application. Text expansion applications allow you to create snippets of text that you can use over and over again.   A snippet can be anything from a word or a single line signature to paragraphs of boilerplate verbiage. You assign a unique trigger abbreviation to each of your snippets.The expansion application runs in the background on your computer so that when you type the trigger abbreviation, your snippet of text is pasted into the document.

There are a number of text expansion applications out there, but the one I use on the Mac is TextExpander 4 ($34.95) from Smile Software.  One of the advantages oficon_home_textexpander TextExpander is that Smile also makes an iOS application, TextExpander touch ($4.99), which can sync with your TextExpander library via Dropbox allowing you to access your snippets both at your desk or on the go with an iPhone or iPad.

So what sorts of things can you do with TextExpander? You can use it to insert signatures that may contain either formatted text and/or graphic.  You can add headings and salutations used in letters or emails.  You can insert the current date and time in any format that you want to use and even do date/time math.  One nice application is the automatic correction of typos.  If you are like me, and there are some words that you commonly type incorrectly, you can use the commonly misspelled word as the trigger and have TE automatically correct the misspelling.  This is very different from that lovely autocorrect function that we find on smart phones and other mobile devices because you make your own library of correction words or phrases, and the computer does not “help” you out by guessing what you are trying to type!   With TE the word replacement is only triggered when you actually type in the misspelled word.

Perhaps the thing I like best is the ability to create boilerplate snippets containing form fields that allow a snippet to be “personalized”.  One of the tasks I do quite often is write recommendation letters for students applying to professional or graduate schools.  In these letters, I have several topics for which I always provide evaluation so I have generated boilerplate introductions for each of these topics that can be quickly “personalized” for each student.  This allows me to concentrate my time on the more important individual comments that I want to make about each student.

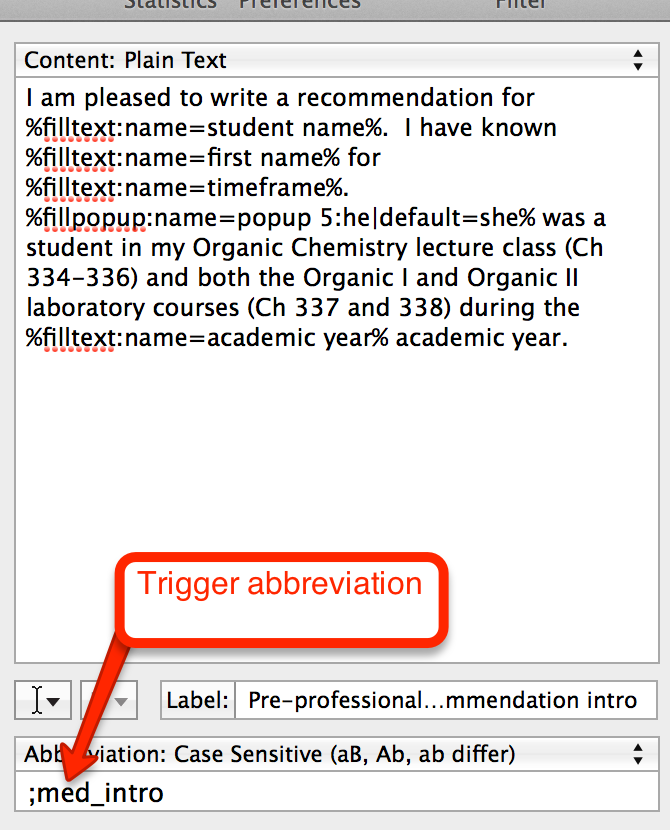
Here is the TE snippet I use at the beginning of my letter for my introductory comments about each student.  The %filltext part of the snippet generates a form fill-in into which I type the “personalizing” information.

TextExpander_form_letter

Here is the fill-in snippet that pops up on my screen when I type the trigger abbreviation. Notice that my trigger abbreviation is not something that I would accidentally type into a document!

TextExpander_form_letter-2

All that I have to do is type the information into the field boxes

TextExpander_form_letter-3

and voilà, this paragraph magically appears in my document!  I can then modify or add other information that specifically pertains to that student.

TextExpander_form_letter-4

I use TE snippets for emails that require only small changes from a stock response, have created items such as expense reports that are quickly filled in and have generated snippets for graphic items that I frequently use in my class materials.

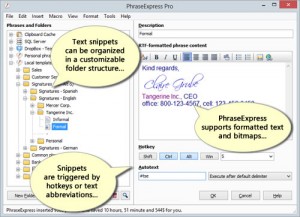
Since TextExpander is a Mac only application, what to do if you don’t have a Mac?    I personally have both a PC and a Mac running simultaneously on my desk at work that I bounce between so I wanted to have my snippets available on both machines.  PhraseExpress, which is billed as Text Expander for Windows, was my answer.  It can be used as a Windows only application or can sync pex9_main_program_window_500pxvia Dropbox with your TE library.  I have found the cross-platform interaction to be quite good.  Snippets created in TE work seamlessly for the most part on the PC, and snippets created on the PC get added to your TE library.  I haven’t done a lot with creating snippets on the PC so I can’t say whether or not the return journey to the Mac is always successful.  Although you can have image snippets in PhraseExpress, this is the one area where I have encountered incompatibility with my TextExpander library.  Typing the trigger abbreviation for a graphic has resulted in the graphic not being inserted by PhraseExpress.  For graphics used regularly, I solved this issue by creating graphic snippets in PhraseExpress that are triggered by the same keystrokes I use in TE.  This strategy seems to work well.  The standard version of PhraseExpress is free for personal use, and there is also an Android app. I don’t have any experience with the Android app so I don’t know how well it integrates.  Maybe someone out there with experience using both PhraseExpress and the Android app, can give a comment review.

No matter what your platform of choice is, go out, get a text expansion application and up your productivity!

iThoughts …Get It While It’s Hot!

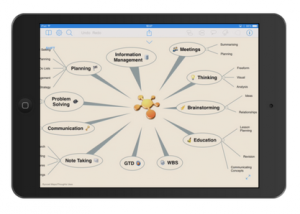
I have been playing around with mind mapping tools lately and found out that an app I really like has been updated and is on sale. iThoughts-iPad iThoughts HD, a great iPad mind mapping tool, has been totally rewritten from the ground up and was released May 13 with a new name, iThoughts for iOS 7 which is universal for both the iPhone and iPad.  Since this release is essentially a new app, if you already own iThoughts HD, you will need to purchase it again.  However, for a limited time it is available for $1.99 in the iOS App Store which is 80% off the regular price.

In addition to the mobile app, there is a companion application for the Mac called iThoughtsX.  iThoughtsXYou can move your maps easily between your i-devices and Mac via iCloud, Dropbox, etc. allowing you to brainstorm anywhere.  When your mind map is complete, you can export it in a variety of ways including OPML, PDF and HTML for sharing or for use with other applications.  To celebrate the launching of iThoughts for iOS 7, the Mac version is also on sale for $48 which is 20% off the normal price.  Although this might seem to be a bit expensive, computer mind mapping tools often range in price from $100-$300.

You can purchase iThoughtsX either from the developer’s (Toketaware) website or from the Mac App Store.  Want to try before you buy?  You can download a free 14 day trial for iThoughtsX from Toketaware.  iThoughtsX licensing allows the software to be installed on multiple computers as long as only one person is using it at any one time.  The developer’s website indicates that educational discounts are available upon request.   Both the mobile and Mac versions are great pieces of software although I really like the convenience of the iPad version for use anywhere an idea strikes me.

Super Simple Tutorial Creation

Ever wanted to make a quick tutorial demonstrating how to do something on a computer for your students or a friend?  You could create a screencast, but if you are like me, you would want it perfect which means investing a lot of time making it.  There is a simpler way.

Clarify_iconClarify by Blue Mango Learning Systems allows you to capture computer screenshots and annotate them.  Although there are any number of apps that allow you to make screen shots including utilities already built into your computer’s operating system, the beauty of Clarify is that you can combine your screenshots with how-to instructions and even non-screenshot images to create step-by-step tutorials.  The program is easy to use allowing you to quickly create your tutorial document which can be exported as an attractive PDF; copied into Word, Evernote or other applications as RTF; or converted to HTML via upload to clarify-it.com.  Clarify is available for both Windows and OS X for $29.99 or $39.99 for a cross-platform license.  For Mac users, Clarify is available from the Mac App Store.   However, there will soon be a new, major upgrade version (Clarify 2), and if you buy from the App Store, you will need to repurchase when it becomes available.  By purchasing from Blue Mango directly, you will be eligible to get the upgraded version. Clarify 2 is now in public beta and has some really great new features.

Want to give Clarify a try?  You can download a free 14-day trial at Clarify-it.com.