
What happens when you put a table on the screen while giving a presentation? First, everyone starts reading it rather than listening to what you have to say. If the table contains a lot of data, some people just zone out. Even if the table is well designed and not off-putting, your punch line is there for all to see so why do they need to pay attention to what you have to say?
So how can you use tables more effectively? I think one way to improve the use of tables in a presentation is to animate them so that only the bits on the screen that are being revealed are directly related to what you are saying. Simple right? Well, not quite if you have designed your table in PowerPoint. You cannot directly animate a PowerPoint table, but there is a work around. Unfortunately, if you are using PowerPoint for Mac, I haven’t found a way to use this trick.
Here is a little tutorial I have put together describing how to animate a table you have created in PowerPoint 2010. I generated this tutorial using Clarify and was able to export the tutorial directly to Word Press using the Clarify 2 public beta which was pretty neat. I am assuming you already know how to use the basic animation features of PowerPoint.
I would suggest that you duplicate the slide you are going to work on before beginning the animation process just in case fate is against you!
Step 1. Make a copy of your table.
Select the table you want to animate, copy it to the clipboard and delete the original table.
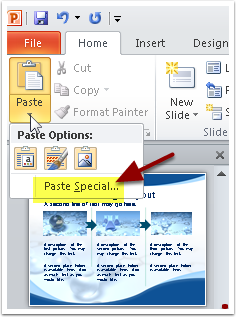
Step 2. Reinsert the table from the clipboard.
Paste the table back to the slide using the “Paste Special” function choosing the Picture (Enhanced Metafile) or Picture (Windows Metafile) option.
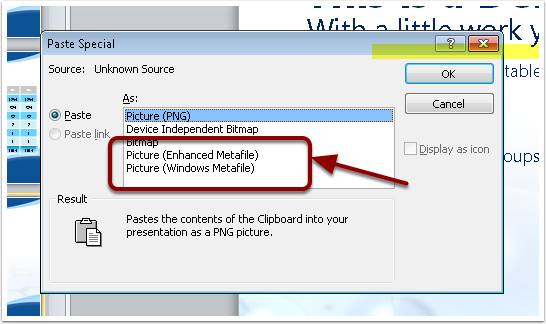
At this point you have converted your table into a picture that you will be able to modify.
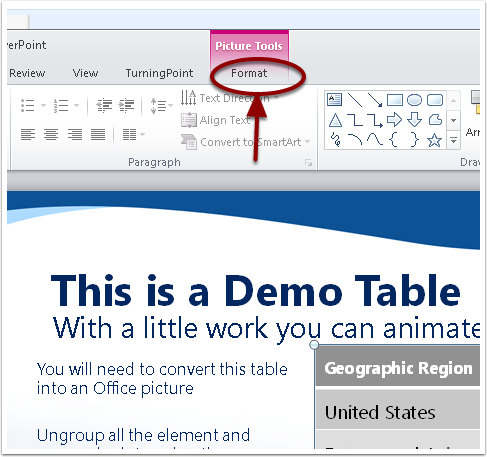
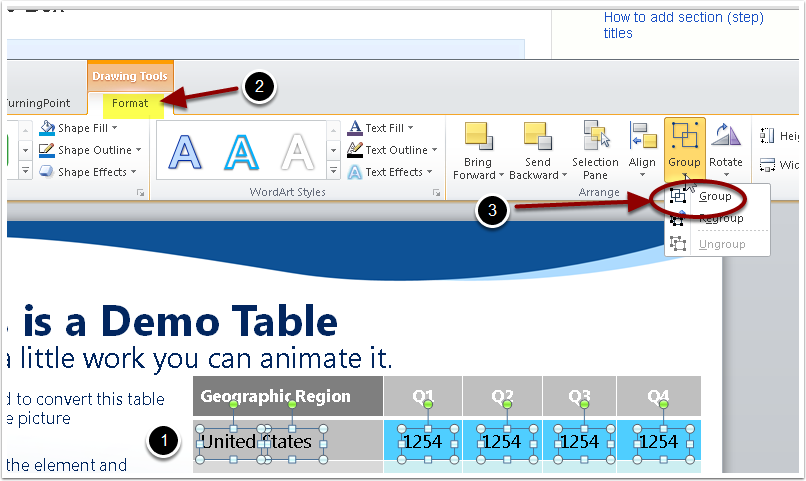
Step 3. Ungroup the various table entries.
When the table is selected, you will see a new menu called the Picture Tools Menu. Click on Format. There will be a menu item, “Group” on the menu ribbon that appears.
Open the dropdown menu and select “ungroup”. This will bring up a dialog box informing you that the item is an imported picture. Choose “yes” to convert your picture into an Office drawing object and redo the ungroup action.
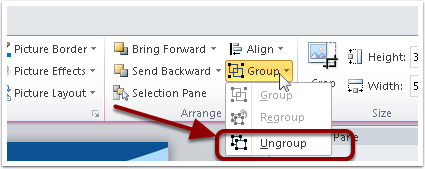
After doing this, you will see that all of the table entries are now separate items that can be used in an animation scheme.

Step 4. Preparing a row for animating
First click outside the table to unselect all the entries. To make the United States row appear on a single mouse click, group all the column entries for that row together. This is done by holding down the shift key while clicking each column entry you wish to include. Open the Drawing Tools Format menu and choose “group”. Then repeat this process for each row of the table.
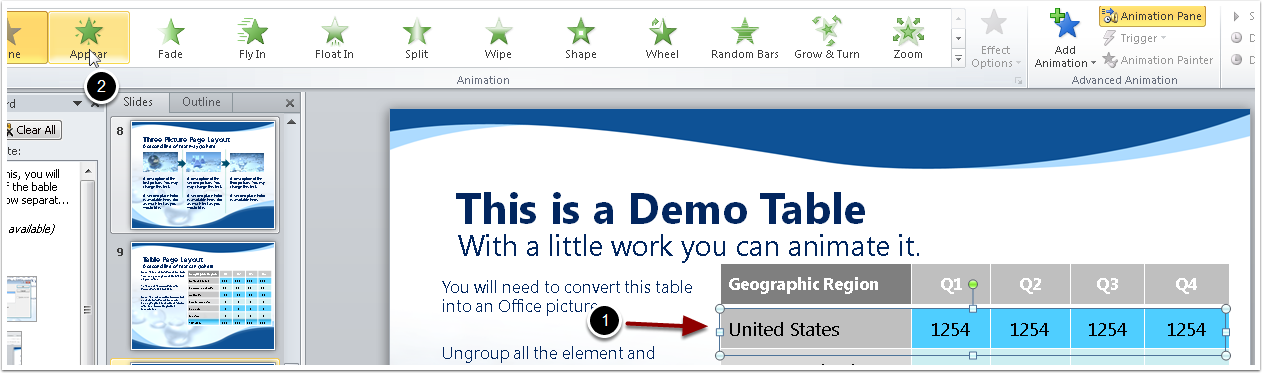
Step 5. Animate the table
From the Animation Menu, open the Animation Pane. To animate the United States row, select the row group and choose the manner in which you want the group to enter, for example, “Appear”.
Repeat the process for each succeeding row.
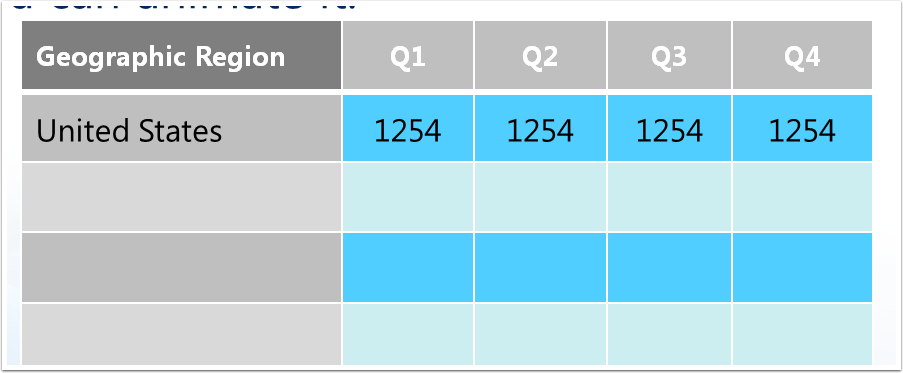
Step 6. Test the Animation
Here is the reveal of the first row.
After a few more mouse clicks, the table looks like this:
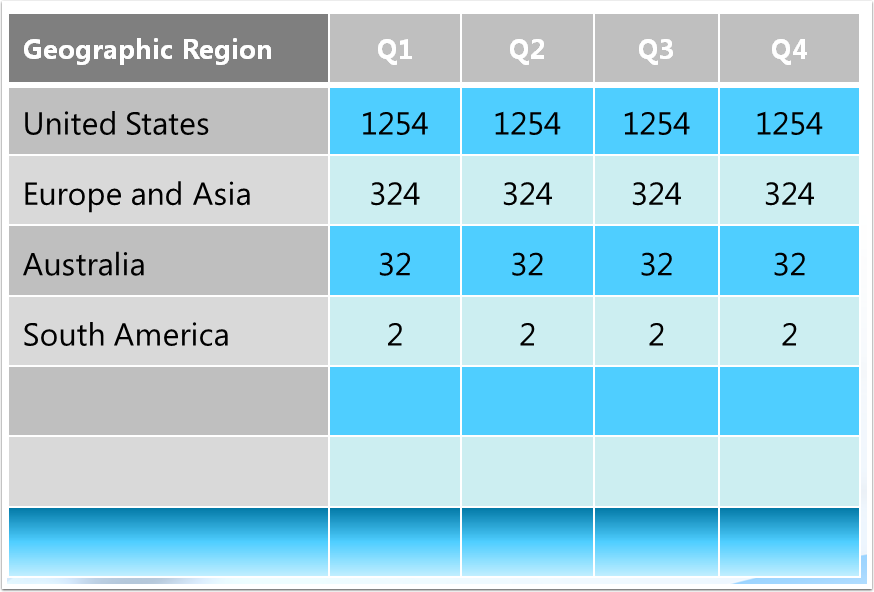
You can group items in your table to reveal data in any manner that you would like. That is all there is to it!