How to Use “Animation” to Spice Up A Classroom PowerPoint Slide.

PowerPoint presentations are frequently referred to as “death by PowerPoint” because often the slides are crammed with paragraphs of words or lists of bullet points.  The slides that come with textbooks are often perfect examples of what I believe should not be used in a classroom lecture.   For example, here are the two consecutive presentation slides that come with the text that I use in my organic chemistry class.  They are a copy of a figure from the text book outlining how one draws the chair form of a cyclohexane ring.

cyclohexane1

cyclohexane2
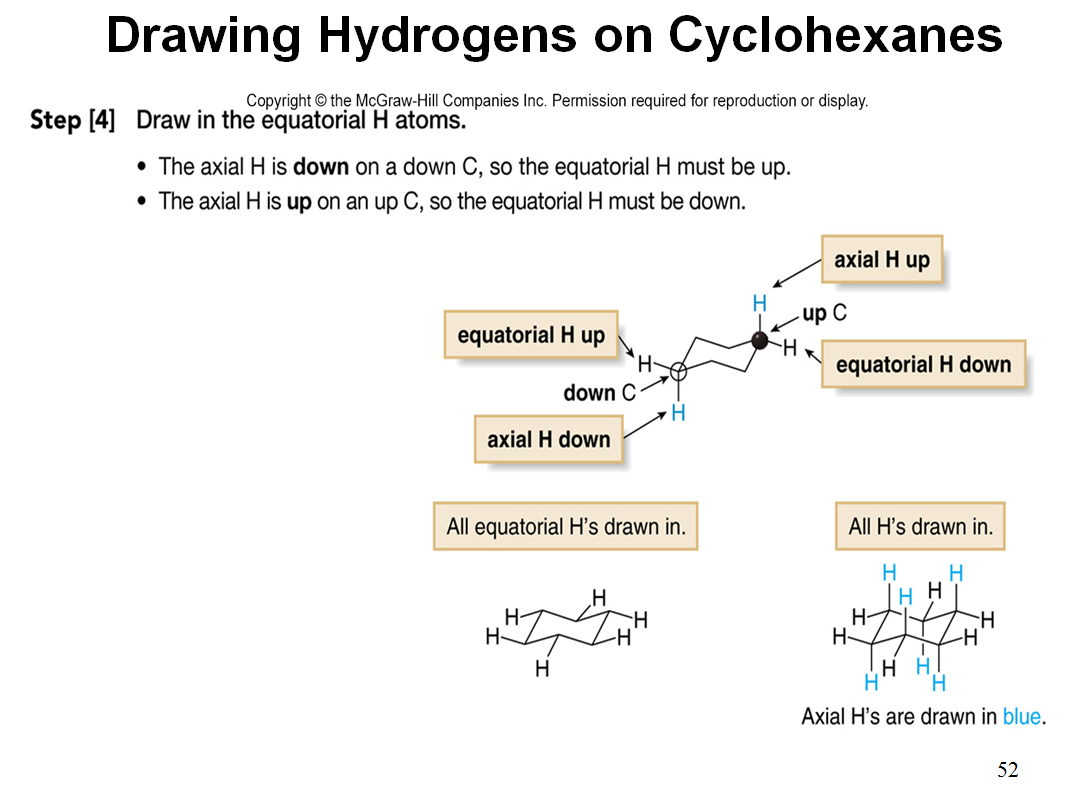
These are not horrible slides, but they show too much information all at once.  It is human nature for us to read everything that appears on a slide rather than listen to what the presenter is saying.

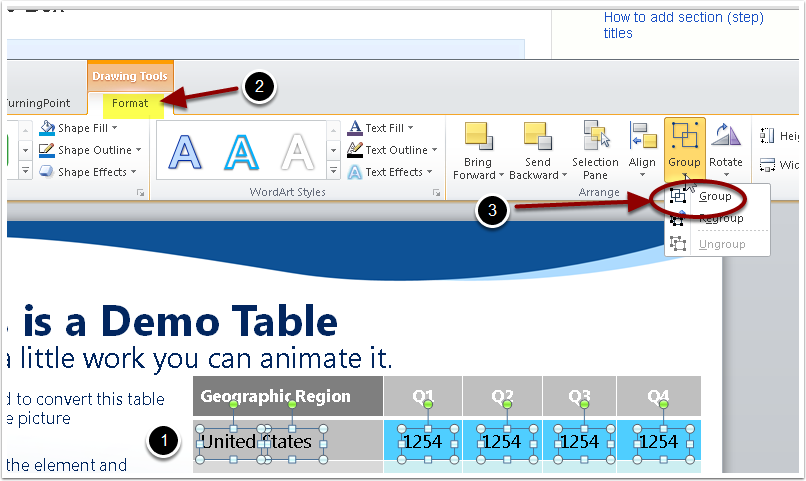
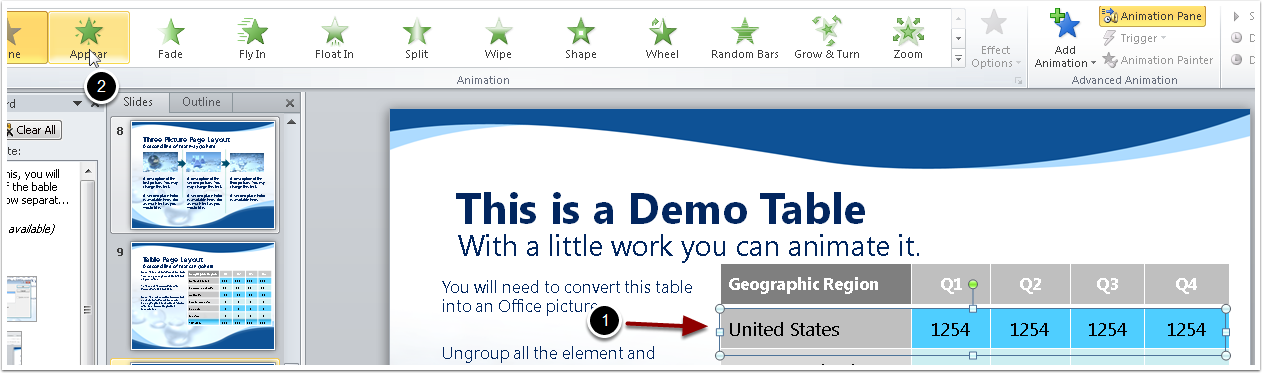
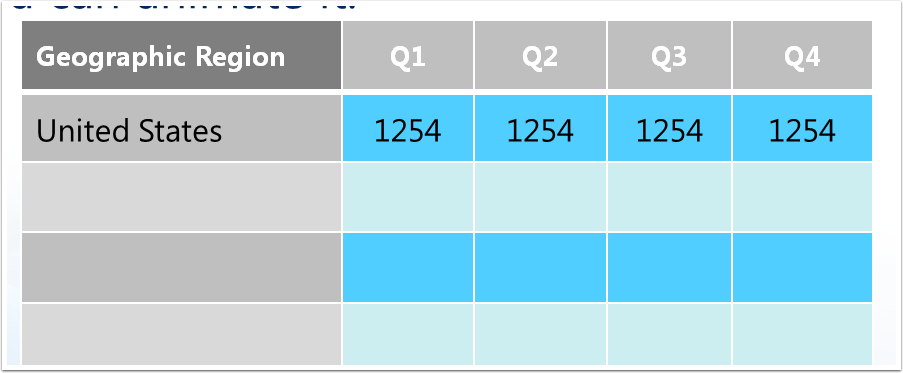
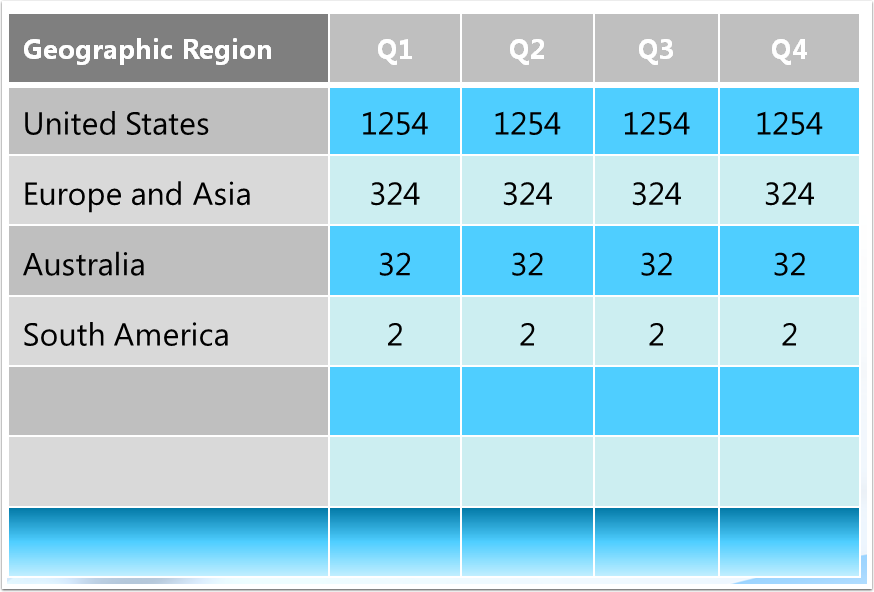
It is very easy to make an “animation” that gets across the same information without having an overwhelming amount of information projected on the screen at all times.  Here is a short video that I have made showing how this same information can be imparted using very simple techniques in PowerPoint.

Obviously, in the classroom, we work our way through the information in a step-wise manner over a period of several minutes. Here I am just quickly clicking through the two slides.  In the lecture, the students have been given a handout onto which they physically draw the chair form of cyclohexane as we progress through the “animation”. Drawing the cyclohexane chair may seem like an easy thing for students to do, but traditionally, mine do not seem to be able to make intelligible drawings without some guidance!  While working our way through the “animation”, everything on the figure from the text is incorporated into the discussion plus we look at physical “ball and stick” models allowing the students to relate their drawing on paper to the three dimensional molecule.

Making this more interactive visual was not very difficult.  If I can make something graphic, anyone can as I have little artistic talent!  All that was required was to insert lines, boxes or circles using the shapes on PowerPoint’s drawing toolbar and then tell them when and how to appear and disappear using the animation toolbar and animation pane.  Although it takes more time to make slides like this compared to just typing a list of bulleted items or using a stock figure from a text book, it is far more interesting and attention holding for  your audience.  With small bits of information appearing on the screen, students are less likely to quickly read what is on the screen and go back to their social activities like texting, tweeting, etc.

Most people tend to remember pictures better than paragraphs of words so I try to incorporate pictures as much as possible on my slides and use words somewhat sparingly so they have more impact when they do appear.  If you want to give students more information, you can always provide them with a lecture outline or make presenter notes to share.


Animating a PowerPoint Table

What happens when you put a table on the screen while giving a presentation?  First, everyone starts reading it rather than listening to what you have to say.  If the table contains a lot of data, some people just zone out.  Even if the table is well designed and not off-putting, your punch line is there for all to see so why do they need to pay attention to what you have to say?

So how can you use tables more effectively?  I think one way to improve the use of tables in a presentation is to animate them so that only the bits on the screen that are being revealed are directly related to what you are saying.  Simple right?  Well, not quite if you have designed your table in PowerPoint.  You cannot directly animate a PowerPoint table, but there is a work around.  Unfortunately, if you are using PowerPoint for Mac, I haven’t found a way to use this trick.

Here is a little tutorial I have put together describing how to animate a table you have created in PowerPoint 2010.  I generated this tutorial using Clarify and was able to export the tutorial directly to Word Press using the Clarify 2 public beta which was pretty neat.  I am assuming you already know how to use the basic animation features of PowerPoint.


I would suggest that you duplicate the slide you are going to work on before beginning the animation process just in case fate is against you!

Step 1. Make a copy of your table.

Select the table you want to animate, copy it to the clipboard and delete the original table.

Step 2.  Reinsert the table from the clipboard.

Paste the table back to the slide using the “Paste Special” function choosing the Picture (Enhanced Metafile) or Picture (Windows Metafile) option.

Step 2.  Reinsert the table from the clipboard.

 At this point you have converted your table into a picture that you will be able to modify.

Step 3.  Ungroup the various table entries.

When the table is selected, you will see a new menu called the Picture Tools Menu.  Click on Format.  There will be a menu item, “Group” on the menu ribbon that appears.

Step 3.  Ungroup the various table entries.


Open the dropdown menu and select “ungroup”.  This will bring up a dialog box informing you that the item is an imported picture.  Choose “yes” to convert your picture into an Office drawing object and redo the ungroup action.


After doing this, you will see that all of the table entries are now separate items that can be used in an animation scheme.

Step 4.  Preparing a row for animating

First click outside the table to unselect all the entries.  To make the United States row appear on a single mouse click, group all the column entries for that row together.  This is done by holding down the shift key while clicking each column entry you wish to include.  Open the Drawing Tools Format menu and choose “group”.  Then repeat this process for each row of the table.

Step 4.  Preparing a row for animating

Step 5. Animate the table

From the Animation Menu, open the Animation Pane.  To animate the United States row, select the row group and choose the manner in which you want the group to enter, for example, “Appear”.

Step 5. Animate the table

 Repeat the process for each succeeding row.

Step 6.  Test the Animation

Here is the reveal of the first row.

 After a few more mouse clicks, the table looks like this:

 You can group items in your table to reveal data in any manner that you would like.  That is all there is to it!

Super Simple Tutorial Creation

Ever wanted to make a quick tutorial demonstrating how to do something on a computer for your students or a friend?  You could create a screencast, but if you are like me, you would want it perfect which means investing a lot of time making it.  There is a simpler way.

Clarify_iconClarify by Blue Mango Learning Systems allows you to capture computer screenshots and annotate them.  Although there are any number of apps that allow you to make screen shots including utilities already built into your computer’s operating system, the beauty of Clarify is that you can combine your screenshots with how-to instructions and even non-screenshot images to create step-by-step tutorials.  The program is easy to use allowing you to quickly create your tutorial document which can be exported as an attractive PDF; copied into Word, Evernote or other applications as RTF; or converted to HTML via upload to clarify-it.com.  Clarify is available for both Windows and OS X for $29.99 or $39.99 for a cross-platform license.  For Mac users, Clarify is available from the Mac App Store.   However, there will soon be a new, major upgrade version (Clarify 2), and if you buy from the App Store, you will need to repurchase when it becomes available.  By purchasing from Blue Mango directly, you will be eligible to get the upgraded version. Clarify 2 is now in public beta and has some really great new features.

Want to give Clarify a try?  You can download a free 14-day trial at Clarify-it.com.