My iPad Love Affair

When Steve Jobs took the stage on January 27, 2010 announcing the “revolutionary” iPad, I thought why in the world would I need a supersized iPod Touch?  Of course, I Vector-iPad_thumbdidn’t… but, got mine the very first day.  It was indeed a magical device which quickly made me wonder how I had lived my life without one.  I have upgraded several times since that day.  I carry a retina mini with me everywhere and have an iPad Air 2.  I use them primarily as information consumption devices for reading, web surfing and video, but do use them for some productivity activities such as note taking, spreadsheet calculations, managing class Moodle sites, editing pdfs and minor writing when on the go.  I must say I do love my iPads!

For a long time, there were rumors that Apple was going to produce a large screen iPad.  I wondered why would I want a steroidal iPad to tote around?  I have a mini because I don’t want to pack around the standard size iPad.  This was one Apple i-device that I did not even consider pre-ordering before it launched.

I teach several courses that are either predominantly or completely online offerings; all have significant writing components, and the students in these classes turn in their work as pdf documents.  During the grading process, I want to be able to scribble comments, corrections, make little drawings, etc on the documents for returning to the students. This is especially important because the students in an online class are often unable to come to my office to discuss their work with me.  I can edit pdf documents on a computer by inserting comment boxes and highlighting the writing, but it never is as clear and efficient as being able to mark up the work with a pen.  My workflow in the past has been to print each pdf, mark it up, scan it and return it to the student by email or some other method.  This has killed many a tree and resulted in carting around a messenger bag crammed full of paper.  So the problem to be solved is how to effectively give feedback to students while saving trees (important to someone like me who teaches environmental courses.)

The solution?  An iPad Pro coupled with the Apple pencil!  The pencil is the game changer here, but, unfortunately, it only works with the Pro and not other iPads. With ipadpro_pencil-hand-print
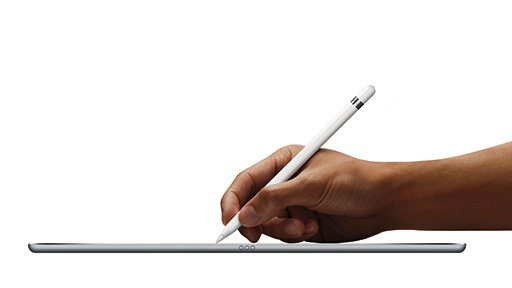
the pencil, I can write on the screen just like writing on paper (truly you can!)  It is legible, at least as legible as my handwriting is.  I can change up colors of “ink” which when combined with highlighting and striking out words does exactly what I would do with paper documents.  When I am done, I can upload the corrected documents to the students via my Moodle shell.  No trees have been killed, only some electrons rearranged!

Here is my workflow:  I download the student pdf documents into a Dropbox folder and open them in PDFpen for IOS from Smile Software.  I append a pdf of the scoring rubric to the end of each document (sometimes I already have done this using PDFpen Pro on my Mac) and then proceed to annotate them with the pencil.  After syncing with Dropbox, I upload the graded documents into the Moodle shell for students to pick up.  Can I say this is magical?

The iPad Pro is a monster.  It is big.  It is heavy, and it is certainly expensive.  You are not going to put this thing in your pocket, and you get tired when trying to hold it up in portrait mode.   Actually, it probably isn’t much different in weight than an original iPad, but it is much more unwieldy.  It is fine to use on a desk or table, and the screen real estate does have its advantages.  With the ability to split the screen between two apps in IOS 9, you can work with two documents side by side which can be very useful.  You can see an entire written page very nicely in portrait mode.  I hope Apple will make pencil use available on the next iteration of the iPad Air as that would be a great form-function pair.

I can foresee some additional productivity use cases for the iPad Pro.  Although I have never envisioned using an iPad as a computer replacement because I need to work with software that is not available on a tablet, I do foresee being able to leave my 15″ Macbook Pro home while traveling when I don’t need access to such applications.  The screen size is great for word processing, and Microsoft has done a nice job with the Office apps for the iPad (assuming you have an Office 365 subscription). I am sure I will find other uses that take advantage of the pencil and sweet screen.

If you think you might have a use for this device, go to an Apple Store and play with one using the pencil before you buy it.  This is not going to be something everyone, or even many people, are going to need.  I didn’t want one, but it solves a big deal problem in my life so I have to say I have rekindled my love affair with the iPad!


Another Nifty Tool for Reading with Your Ears

I recently posted about a text-to-voice app called Voice Dream Reader which you can have read an open document to you on a mobile device. Allison Sheridan (Podfeet.cNarro copyom) recently wrote about another platform agnostic, nifty tool that will convert a website to audio called Narro, and I just had to try it out.  What is neat about this app is that it will take the url of a website you bookmark and convert the text into a podcast that is delivered to a podcast player on your mobile device.  Since I am a voracious consumer of podcasts, this is great.  The Narro podcast just gets merged into my play list for consumption.

Adding an extension to Chrome or a bookmarklet to the bookmarks bar in other browsers on your computer gives you a “button” that you click when you want the url for the website sent to Narro.  There is also an IOS Narro app that can be used while mobile surfing.  To use the service, you sign up for a free account at www.narro.co which provides you with your own personal podcast feed.  There are 15 voices with a variety of accents from which to choose for your listening pleasure, or you can have it do a rotation of voices.  Like Voice Dream Reader,  the voices are not real humans, but they are pretty good for machine generated voices.  With the free account, Narro will allow you 20 conversions per month.  If you need more conversions, Narro Pro is your ticket.  The pro version ($7.99/month) gives you other features as well.  It allows you to create audio files from plain text documents, sync articles from read it later services such as Pocket and Instapaper (does anyone really actually read the things stored there later?), convert emails and attachments to audio and have RSS feeds delivered in podcast form.  I use Feed Wrangler to deliver RSS feeds from several blogs into the Mr. Reader app every day.  However, many days I do not have time to read the posts so they just build up and get deleted when the list becomes too long.  Of course, I know that I throw away things I really needed to know about!  It would be great to have the RSS feeds come to me as a podcast daily for listening to when doing other tasks.  I haven’t yet decided if it is worth the monthly fee to have this feature, but I definitely am thinking about it.

You should check out Narro.  They do not ask you for any financial information when signing up for the free account so you don’t have to worry about ending up with some subscription you didn’t mean to pay for.  Why don’t you try it out…the price is right!

Free Countdown Timers for Classroom Applications

In my flipped organic chemistry class, active learning is encouraged by asking questions and posing problems for students to solve (see my post “Enough with the Lecturing“.)  To foster engagement, students record their answers using student response devices, “clickers”.  As an aside, I, unfortunately, have found that a grade needs to be assigned to their work for them to take it seriously.  Most of the time, the questions require the students to work out the solutions.  They are allowed to use anything at their disposal to arrive at a solution including notes, textbook, collaboration with other students, etc.  In these cases, students are given amounts of time to work out the answers commensurate with the difficulty of the problem.  lightning_roundHowever, on occasion, we have what is called a “lightning round” in which objective questions which should not require any in depth discussion or complicated reasoning to answer are asked.  These questions must be answered individually with no aids as if they were quiz questions.  During the lightning round, the students are typically allotted 30 seconds to one minute to log their responses depending on how long it should take an average student to read the question and possible answers.  To ensure that I do not close the polling  too quickly, or leave it open too long, I add countdown timers to each question slide.  One of the timers I like is a little hour glass “animation” that empties just like an old fashioned egg timer.  When the “sand” has all gone from the top to the bottom, I close the polling.  The images below show the timer at the start, a midpoint, and at the end.

countdown screen shot countdown screen shot2 countdown screen shot3

These timers are part of a package containting a variety of different styles designed by David Foord.  All are free for use in educational or non-commercial applications.  If you have a use for countdown timers that work in Power Point, you can download them from A6 Training.


Surfacing from Mounds of Documents: Reading with Your Ears!

Journal articles, pdfs, webpages, etc….so much to read…..so little time!

If you are like me, you have mounds of documents to read.  Many years ago, I was an early adopter of an Audible subscription.  For those of you who are unfamiliar with it, Audible, now a subsidiary of Amazon, sells audiobooks.  I have little time to read fun stuff so I listen to the best new books, classics and anything in between while driving, flying, going to the VoiceDreamReadergym, doing house chores, etc.  It is a great service, but it does not help me get through all the professional stuff I need to read.  So, the problem to be solved is how to use some of this time to get some professional reading done.  The solution is an app for mobile devices called Voice Dream Reader.

Voice Dream Reader will read almost anything text to you excluding DRM-protected documents.  The app was designed to make text accessible to the visually impaired as well as those with dyslexia and other learning styles.  If you have a tablet such as an iPad, you can turn on the screen reading accessibility option to have what is on the screen read to you.  I have tried this and found it to be cumbersome although you can use it with texts such as Kindle books which do not work in Voice Dream.

The app is incredibly easy to use.  You open the document you wish to have read to you and press the play button.  As the text is being made audible, the line being read is highlighted on the screen with the current word appearing in a box.  Although I don’t really have a use for that, I think it is a great feature for aiding those who are learning to read or have difficulty reading.  The program is auto-scrolling so you do not have to change the pages of the document manually, and you can adjust the speed of the reading from very slow to speed reading.  There are multiple voices available so you should be able to find one you like, and the program can read to you in 30 languages.  To start being productive, all you have to do is open your document, don your headphones, press play and do your chores or work out.

I find this to be a great way to digest documents I have saved as pdf files.  My work flow for this is to save the text as a pdf, print to pdf or scan the document.  If I scan the document using my Fujitsu Scan Snap, it automatically asks me if I would like to OCR the document which I do.  If I have scanned document some other way, I open it in PDFpen Pro (an awesome OS X program for working with pdfs), and OCR it.  Doing the OCR not only allows me to use the pdf with Voice Dream but also makes the text searchable which has lots of other uses.  Voice Dream Reader handles a large number of file formats other than pdf as well.VoiceReaderContent

Voice Dream Reader is not Audible!  There is no human reading you the document.  It is definitely a computerized voice that does not always get the pronunciation right and does not recognize that a hyphen at the end of a line of type splits a word into pieces that should be combined for reading.  While this can sometimes be a bit annoying, voice technology has come a long way in sounding more natural, and I find these annoyances a small price to pay for how it helps me get stuff done.

Voice Dream Reader is available for both IOS and Android devices for $9.99 and comes with one voice, Heather.  Additional voices can be obtained as in-app purchases.


A Simple App for Saving Anything You Want To Access Later

Captio is a no frills IOS app that lets you type or paste information onto the screen of your mobile device, hit the send button and have the information appear in your email inbox. Captio logo   All you need to do is enter your email address once into the app during setup, and you are set to go.  Although the app was originally designed for the user to send him/herself quick reminders, I find it to be a great application for sending web links from my iPad to either my Mac or PC computer for later use.  While I can do the same thing by writing myself an email, Captio really does this very efficiently as all I have to do is copy, paste onto the Captio screen and hit send.  I do not need to type an email address and delivery is extremely fast via Google’s mail servers.  Sometimes taking a photo of something is more efficient than typing a note, and you can add both photos and screenshots to Captio for delivery easily.

To make a screenshot on an IOS device, you press the Sleep button (located at the top or side depending on the device) immediately followed by pressing the Home button which stores the screenshot in the Photos app. captio_screenshot To transfer the screenshot, you press the “+” button in the lower right hand corner, click the picture icon, choose the screenshot photo, and hit send.  All of this takes about a total of 30 seconds.  While you can share photos via email, since Captio is set up to send directly to your inbox, the entire process is quicker than using your email app.  If you want to take a picture of something to send,  you hit the “+” button in the lower right hand corner of the Captio screen, click the camera icon, snap your photo and send.

If you are off-line and want to send yourself a reminder, Captio will store the email.  When your device is online again, it will automatically send the note to your inbox.

This is a great little app that does one thing (email pieces of information) and does it well.  Captio costs $1.99 in the Apple App Store and works on both the iPhone and iPad.

An Information Organization Tool for Academics and Students Alike

Tired of searching through hundreds of bookmarks or searching through a bunch of folders on your computer for that website or paper that you know you saw and now need but can’t remember where you put it?  I might just have a solution to your informational organization woes.

Every spring term I teach CH 407 Seminar which is a capstone class for our chemistry majors in which they are required to carry out an in depth literature review on a topic of current interest in chemistry, biochemistry, environmental or forensic science and present a public seminar on that topic.  One of the things I try to do in all my classes that involve students developing research and writing skills is to expose them to different technological tools that can aid in completing their projects.  This year the students learned to use an open source information manager called Zotero which allows you to collect, manage, and generate citations for research sources.  While there are a number of research management tools out there, Zotero is a good choice for students because it is both a cross-platform solution and is free!  Zotero was developed as a plug-in for Firefox but can work in other browsers such as Chrome and Safari through the Zotero standalone application.  Zotero allows you to organize your research materials into searchable project collections, attach pdfs, notes and images to your citations and generate bibliographies using word processors such as Word or OpenOffice.  You can sync your Zotero library allowing access from multiple computers.  References can be added to your Zotero library directly from a database, a journal’s website, a Google Scholar search, a library’s catalog, a webpage, from pdf files you have made by scanningdocuments or from pdfs that are stored on your hard drive, etc.  When needed, you can generate citations in one of more than two thousand formats.  This is a particularly useful feature for my students who are required to prepare and distribute an annotated bibliography to accompany their seminar presentation.  Here is a short video that gives you an overview of the features of Zotero:

While free is a very good price for students, there are other options for the gainfully employed academic.  Probably the closest rival to Zotero in the paid market is Endnote ($249.95 download or $299.95 shipped ; $113.95 with student discount).  Both tools possess many similar features.  There is a very good article in The Chronicle of Higher Education by Brian Coxall that compares the two products.  If you are interested in a reference management tool, I would suggest you read Brian’s article to see which solution is right for you.

An Unusual Way to Present Introductory Information on a PowerPoint Slide

Sometimes an interesting opening slide can get your audience’s attention.  There is a website that will generate a “newspaper clipping” that can be used to create an unusual introductory type of slide.  All you have to do to generate a clipping like the sample one I’ve added Sample_Newspaper_graphicis go to the newspaper clipping generator and type in a fictional name for your newspaper, a date, a story title and some copy.  The site will generate a jpg graphic file that you download to your computer and insert as a picture on your slide.  I just grabbed something from one of my chemistry students senior seminar abstracts to make this sample graphic.  The entire process took about a minute.  This is not something that should be overused, but I thought it might be an interesting way to present introductory material….and yes, your audience is going to read it, but it could be part of what you are saying in your introduction.  Clicking the link above will take you to the graphic generator.

Re-Kindling The Blog


This academic year has been incredibly busy, and as a result, I haven’t found the time to make posts to the blog.

Courtney_Dirks_To_do_graphicI hope to get some new content posted and revisit some topics that were raised in the past such as using mind-mapping software and other new tools in my Capstone Seminar class.  I also started a new project that involved a trip to the Galapagos Islands and will do some posts on what I am doing on that project that might be of interest to others.  Stay tuned…

Graphic: Courtney Dirks, FLICKER Creative Commons

A Nifty Way for Mac Users to Summarize Articles

I’ve been doing a lot of literature review for a new research project. One problem you run into when you come up with a large number of lengthy articles is time to read them. If you are a Mac user, there is a nifty tool available to help with this problem. This tool called “Summarize” allows you to condense an article to get the gist of it so you can decide if it is valuable for digesting in more detail later. These summaries also can be used the way we used 3 x 5 cards in the good ol’ days to catalog information when writing research papers. If you aren’t doing research, Summarize can be used just to abridge the daily news, etc. It is one of those interesting little tidbits in OS X that most Mac users have no idea even exists!

You have to activate this feature of OS X to be able to use it. To do this, go to the System Preferences menu (click on the little Apple at the top left of your screen to get there) and choose Keyboard. In the box of Keyboard preferences, choose the Shortcuts Option. system_preferences_summarize1Choose Services in the lefthand pane. In the righthand pane, scroll down almost to the bottom and check the Summarize box. Clicking on “add shortcut” allows you to choose a keyboard shortcut for calling up the Summarize feature on the fly (my shortcut is option+command+s). You can now use this feature with anything you wish to condense such as a word processor document, website article, etc.

When reading a document, select the portion of the document you would like to condense (command+A will select the entire document), and open the Summarize function. If you did not make your own keyboard shortcut, you will have to access Summarize by right-clicking the selected text and choosing the Services option from the menu. When the Summarize window opens, you will see a plain text document. At the bottom of the window, you can alter how condensed the summary is by adjusting the summary length with a slider. In paragraph mode, Summarize chooses what it deems to be the most “important” words and shows you the paragraphs that use them the most. In sentence mode, Summarize chooses individual sentences containing the “important” words.system_preferences_summarize2

You can copy and paste the summary into another document or save the summary as a file (command+shift+S). The file is a text file that can be used in a word processor document or anything else that can use text files. When you name your file, if you manually add the RTF (rich text) extension, the Finder will be able to generate a preview of the document.

If you haven’t played with Summarize, give it a try to see if you have a use for it.  I don’t know of a similar function in Windows.  If someone knows of one, I would love to try it out.

If You Make “How To” Documents, This is a Really Sweet Deal!

I wrote an earlier post about Clarify by Blue Mango Learning Systems which is a great application for making quick tutorials demonstrating how to do something on a computer for your students or friends without investing a lot of time making screencasts.  The application allows you to capture computer screenshots and annotate them.

Clarify_iconClarify 2 is now available and has some new awesome features including the ability to now have nested steps, multiple images per step, nested lists, and use auto-numbering of steps.  You can output your tutorial into a customizable PDF, as a Word document, HTML, Markdown or send to a WordPress blog.  You can also make custom Word or HTML templates if you so desire.  To learn more about the features of Clarify 2, go to the Blue Mango website.  Clarify 2 is available for both OS X and Windows platforms, and there is also a cross-platform license which is what I have.  You can download a free 14-day trial version if you want to try it out.  However if you want a really sweet deal, you can get it for half-price from now through Cyber Monday from the Clarify Store for just $14.99 if you use the coupon code CYBERMONDAY2014.  If you haven’t already done an upgrade from the original Clarify to version 2, you can also do that for $14.99.