Mount Hood

Plan the day away with a planner

How to start using a planner

Allison Vanderzanden | Lifestyle Editor

With 95% of Western’s classes being held online for fall term, keeping up with a schedule is more important than ever. Students have to be their own regulators of their study time outside of virtual meetings. A great way to stay on track is by using a planner, and here are some tips on how to use one most effectively.

Start by picking a planner or printing out free planner sheets to put into a binder;  daydesigner.com is just one site that offers free sheets in many styles. Pick a layout that has room to detail each class and associated workload. This may look like a weekly layout with columns on the side to expand on what assignments are due.

Next, color code assignments and classes. Use a highlighter or colored pens and markers. Some categories to code by are types of assignments, such as readings, discussion posts and projects, or class — whichever makes more sense personally. Also give a color to other tasks and events, such as work, vacations and trips to the gym or grocery store.

Now it’s time to pull out the syllabus. Write down class meeting times, assignment due dates and quiz and exam dates for the term with desired colors. Then add in other events as far ahead as is known. Finally, find some gaps in which study time for each class can be allocated. It is important to have designated times for studying and completing homework in order to keep up with classes. This time could be half an hour or several hours, but it should be set aside to do classwork uninterrupted. 

Starting a planner is the first step, but keeping up with a planner takes more persistence. To help with motivation, check off tasks and days once they are completed. Focus on one to two weeks of work at a time if seeing the entire term at once is overwhelming. Set aside a few minutes a day to check up on upcoming events to make it part of a routine, and always feel free to update the planner as life happens.

Contact the author at avanderzanden19@mail.wou.edu

At-home exercises for every home-body

Exercises anyone can do outside of the gym

Allison Vanderzanden | Lifestyle Editor

A new school year is a time for a fresh start — students have the opportunity to get organized, manage their time and get into a healthy routine. Exercise is an important activity to add to one’s regular routine, as it can reduce the risk of certain diseases and improve mood and mental health, according to betterhealth.vic.gov.au. With many gyms still offering limited service, here are a few exercises anyone can do from home.

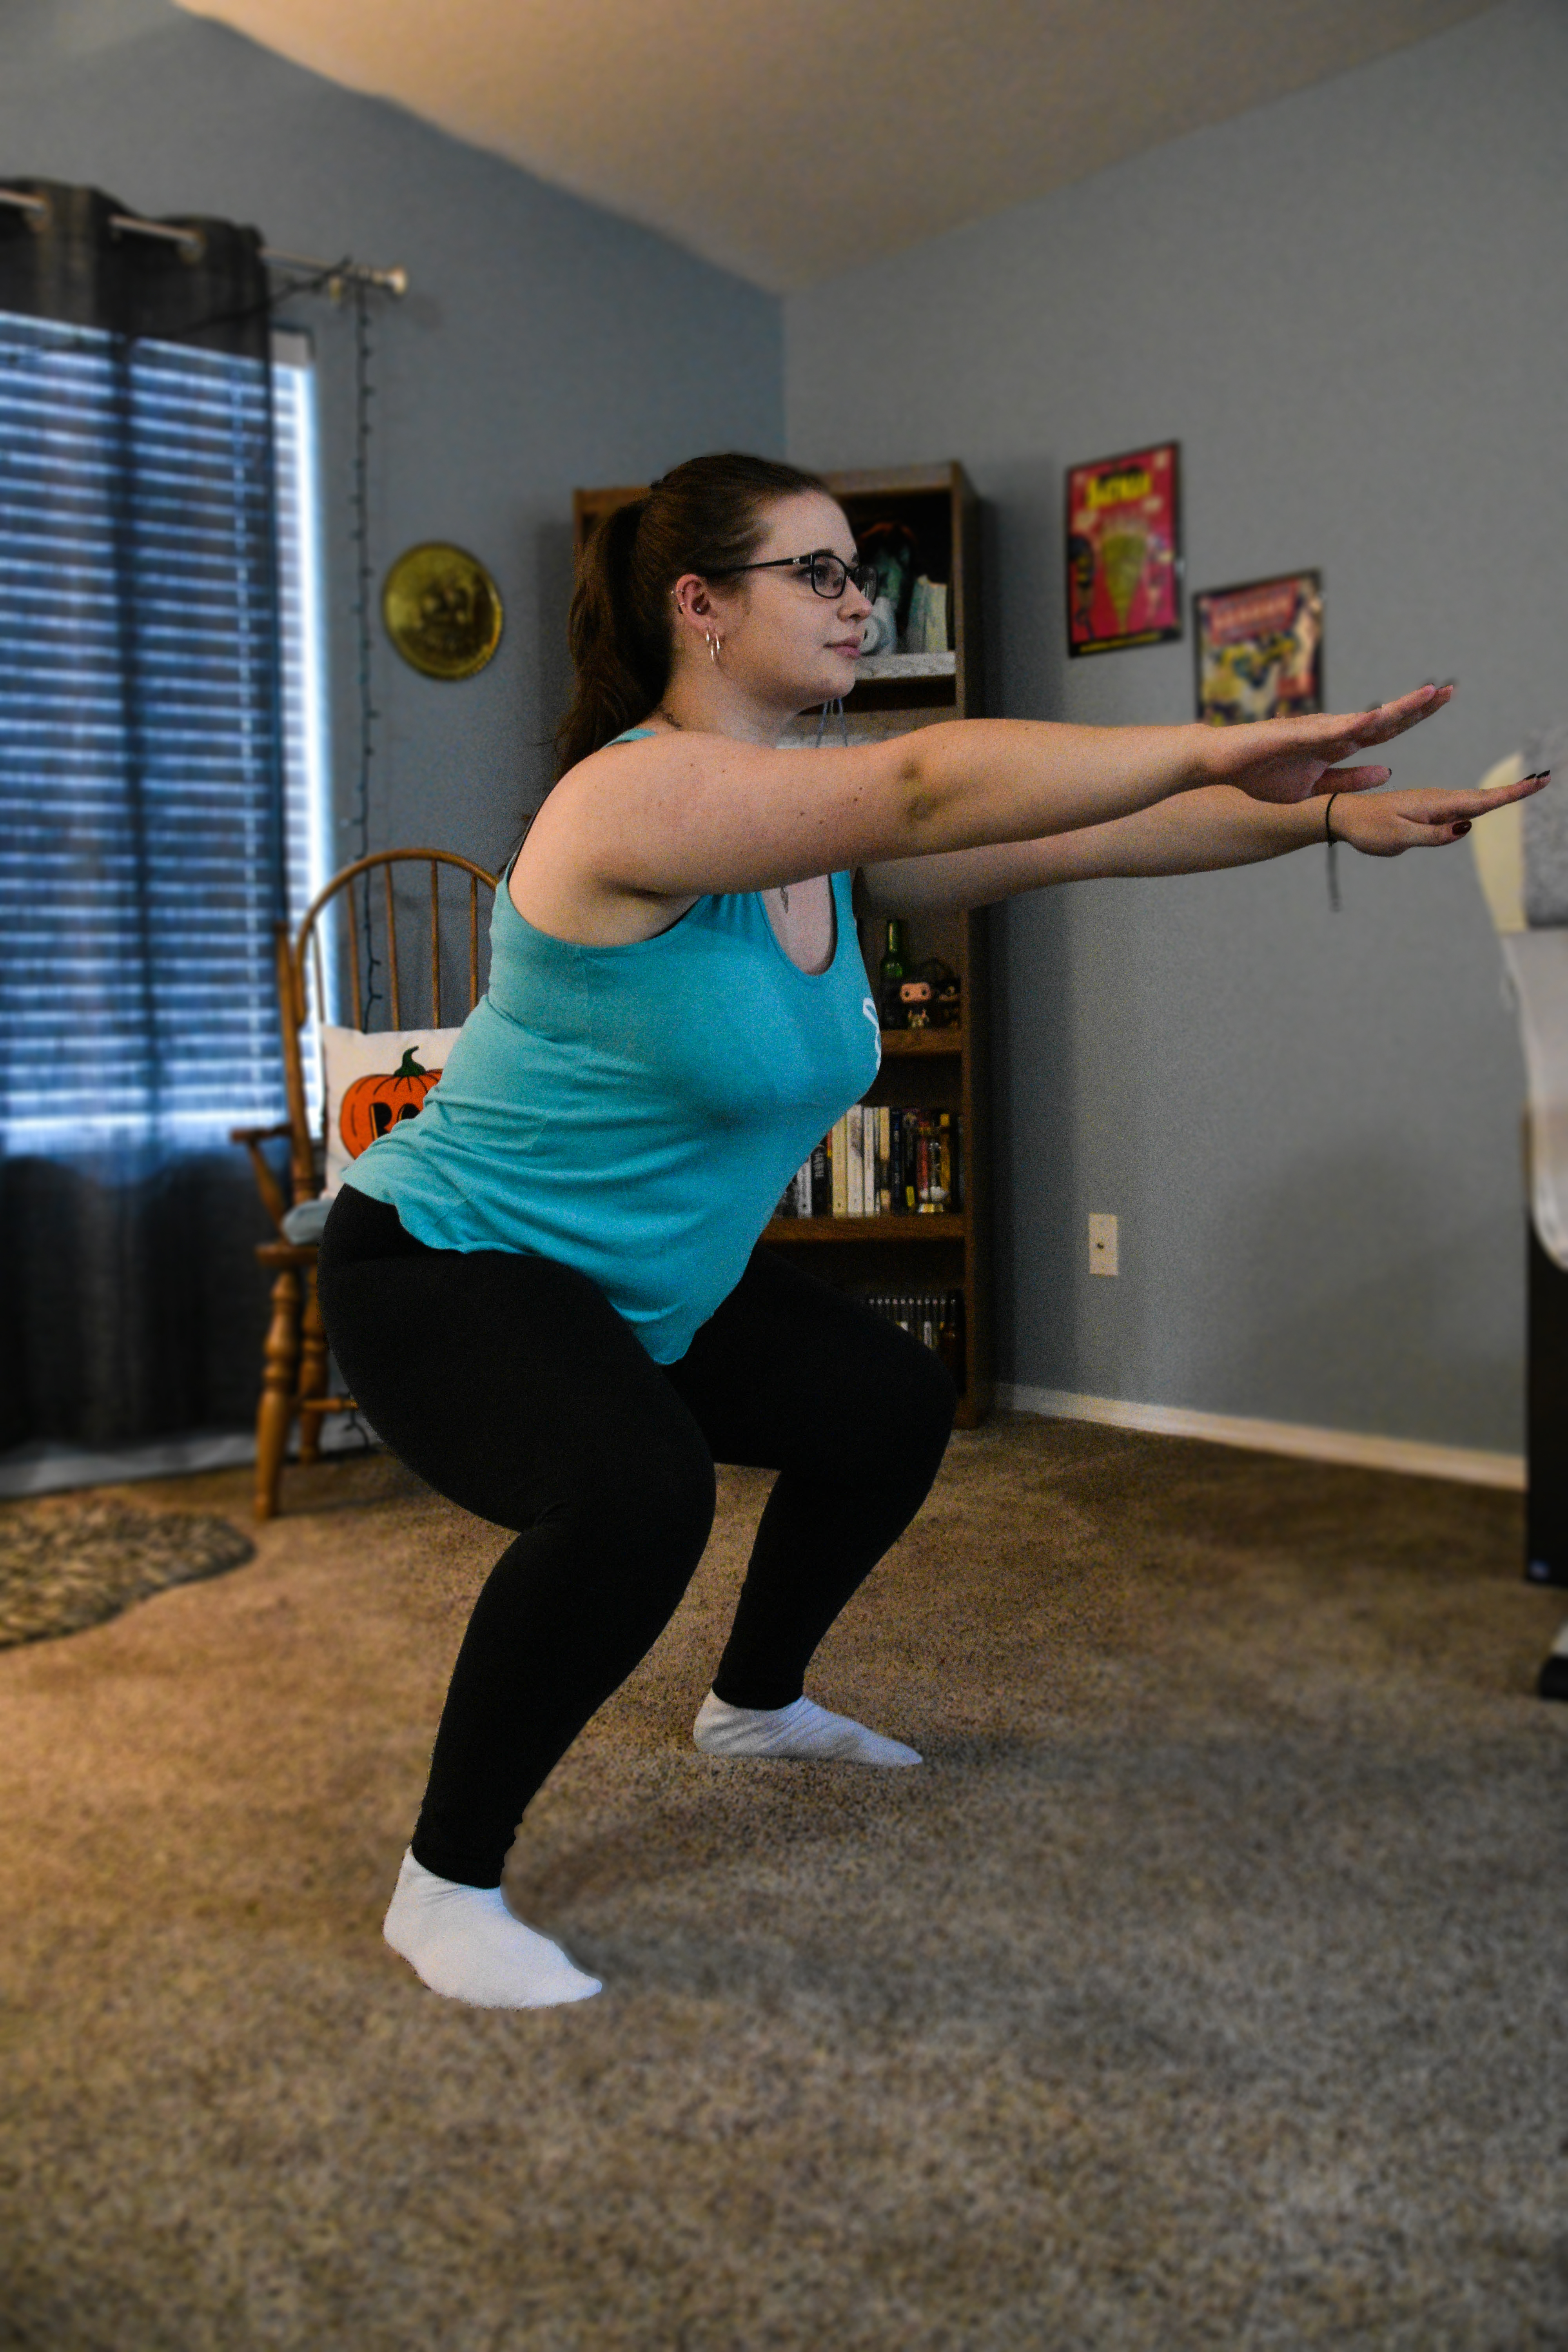
To work out leg muscles, do bodyweight squats. With feet slightly more than hip width apart, hold arms out straight ahead, parallel to the floor. Lower down until thighs are parallel to the ground, then return to standing. Complete up to three sets of 12 reps. Make squats easier by utilizing a wall, or add a challenge by doing one-legged squats.

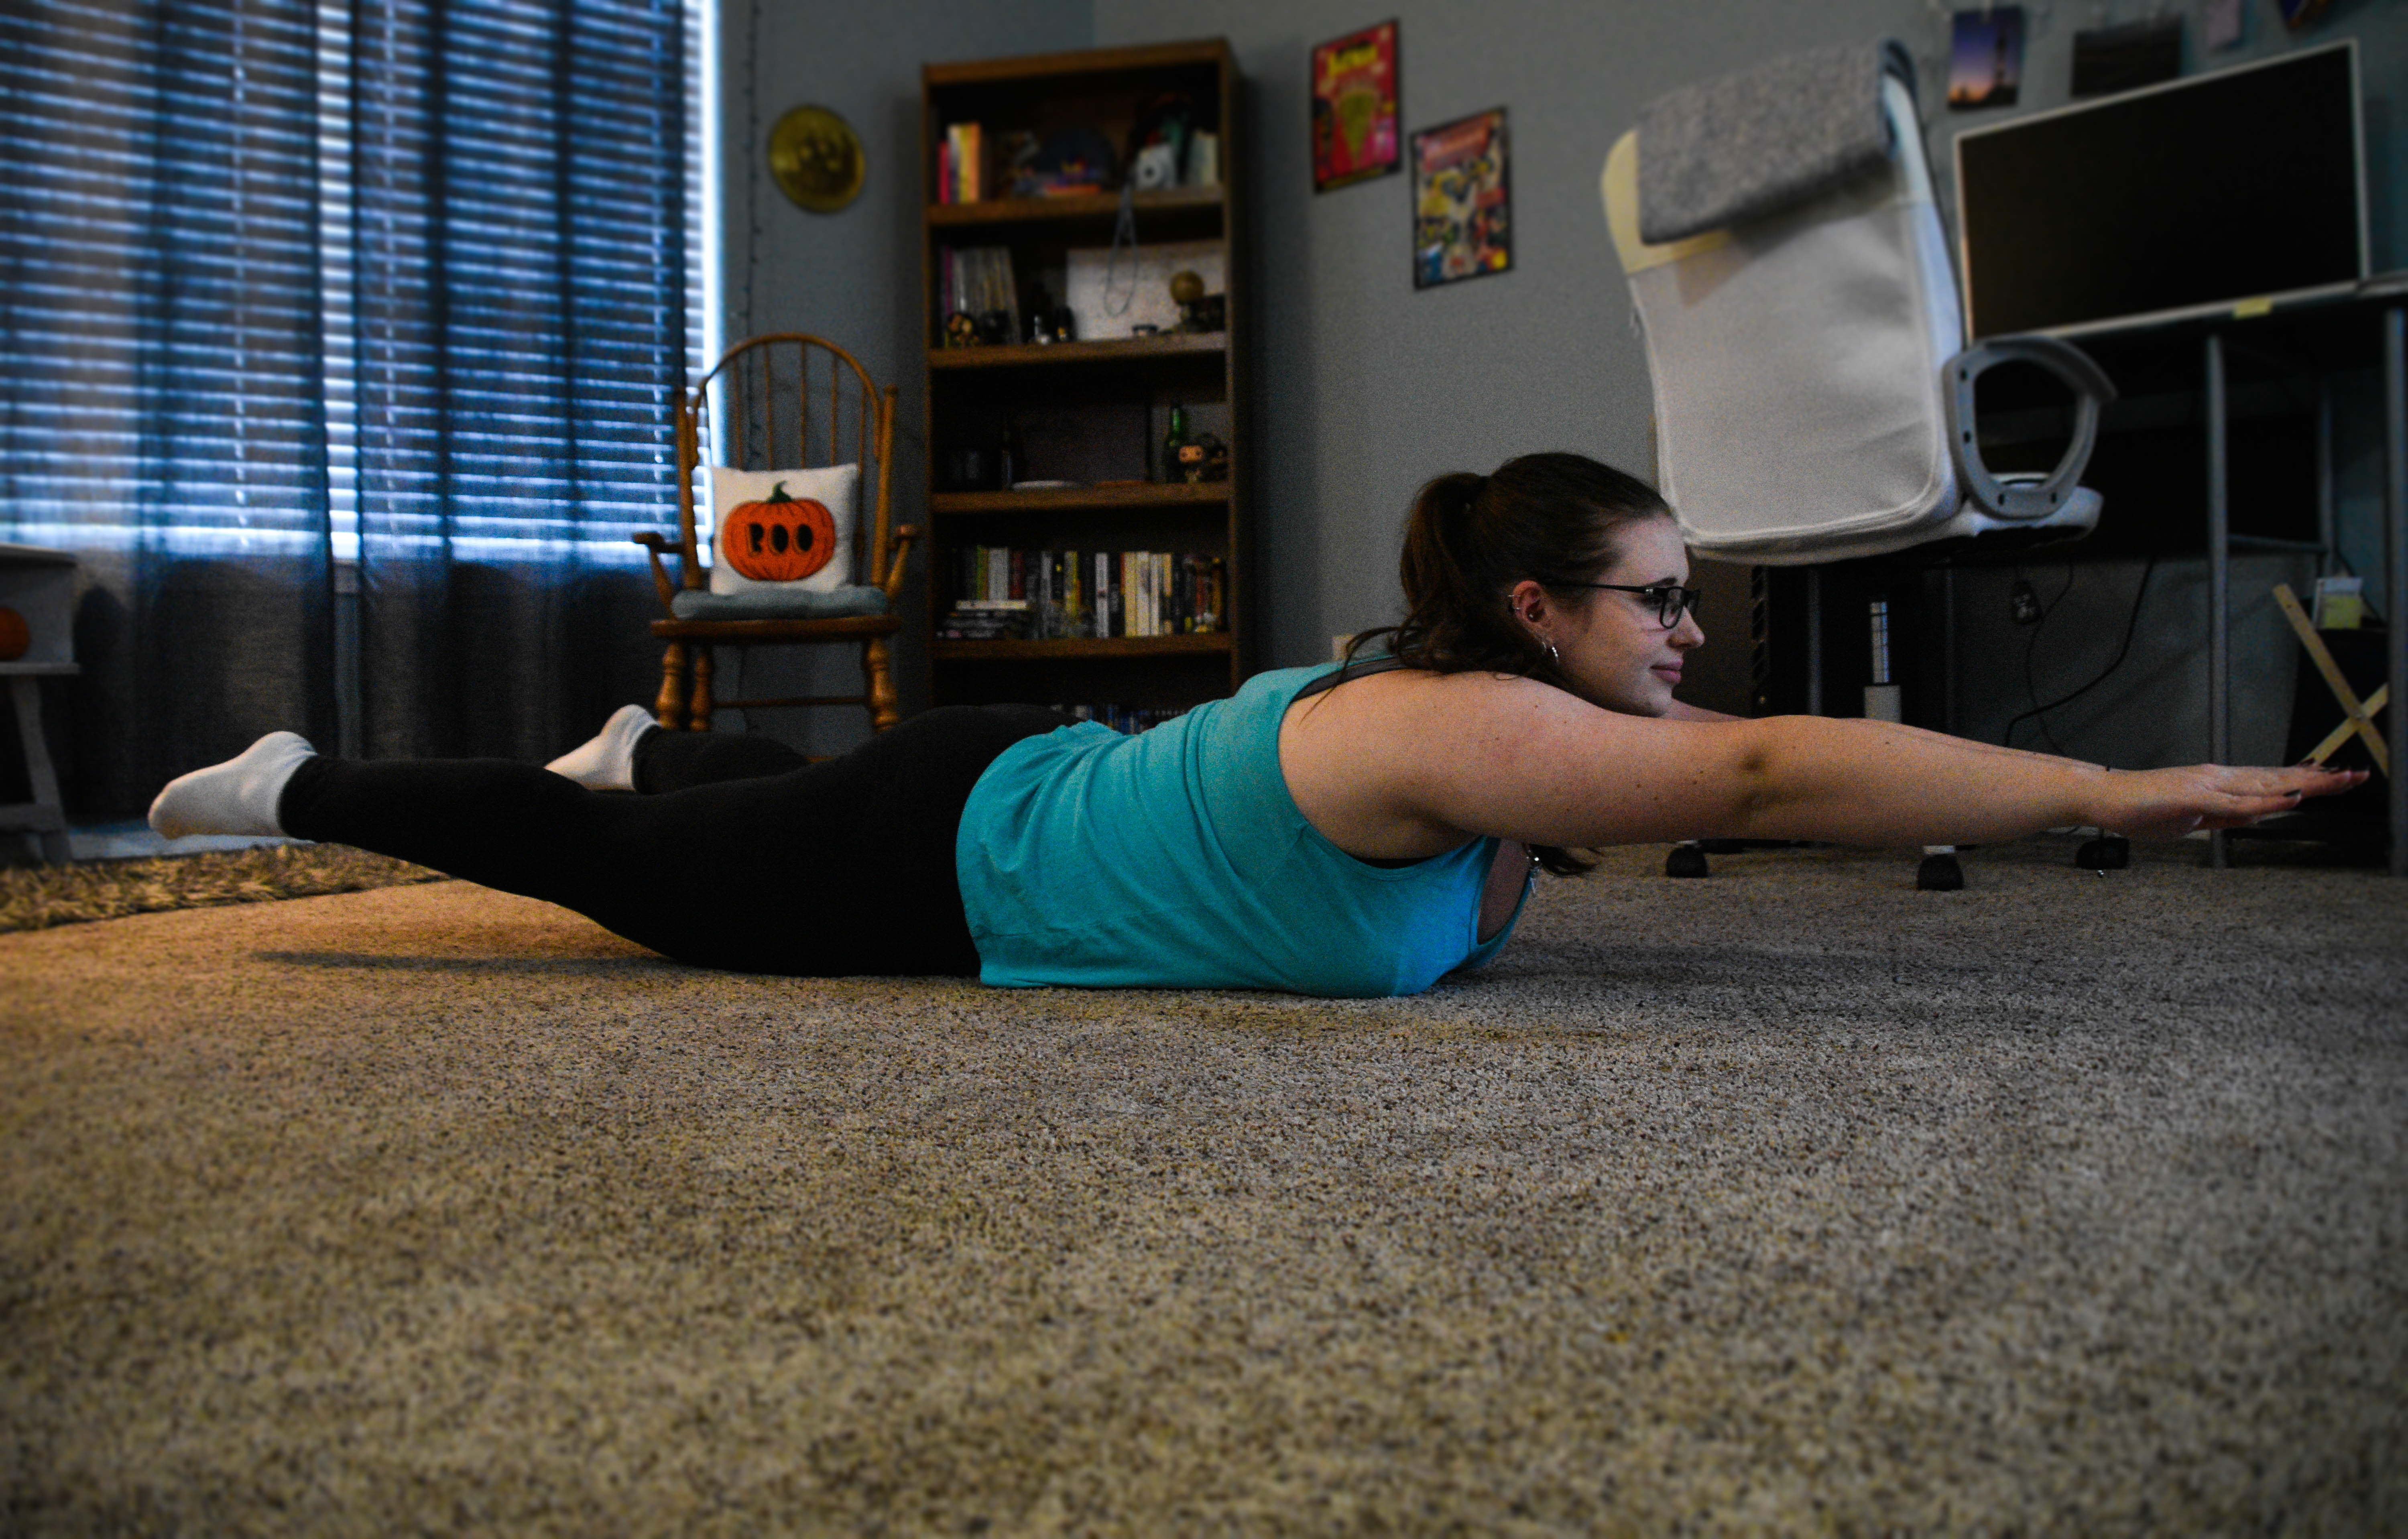
One back workout to try is the Superman. Start by lying facedown on the floor with arms outstretched in front and legs straight. Keep every limb in a straight position, and simultaneously lift them several inches off the floor. Hold for a few seconds, then slowly return to the starting pose. Do about three sets of 10 reps; adjust the amount of reps to modify.

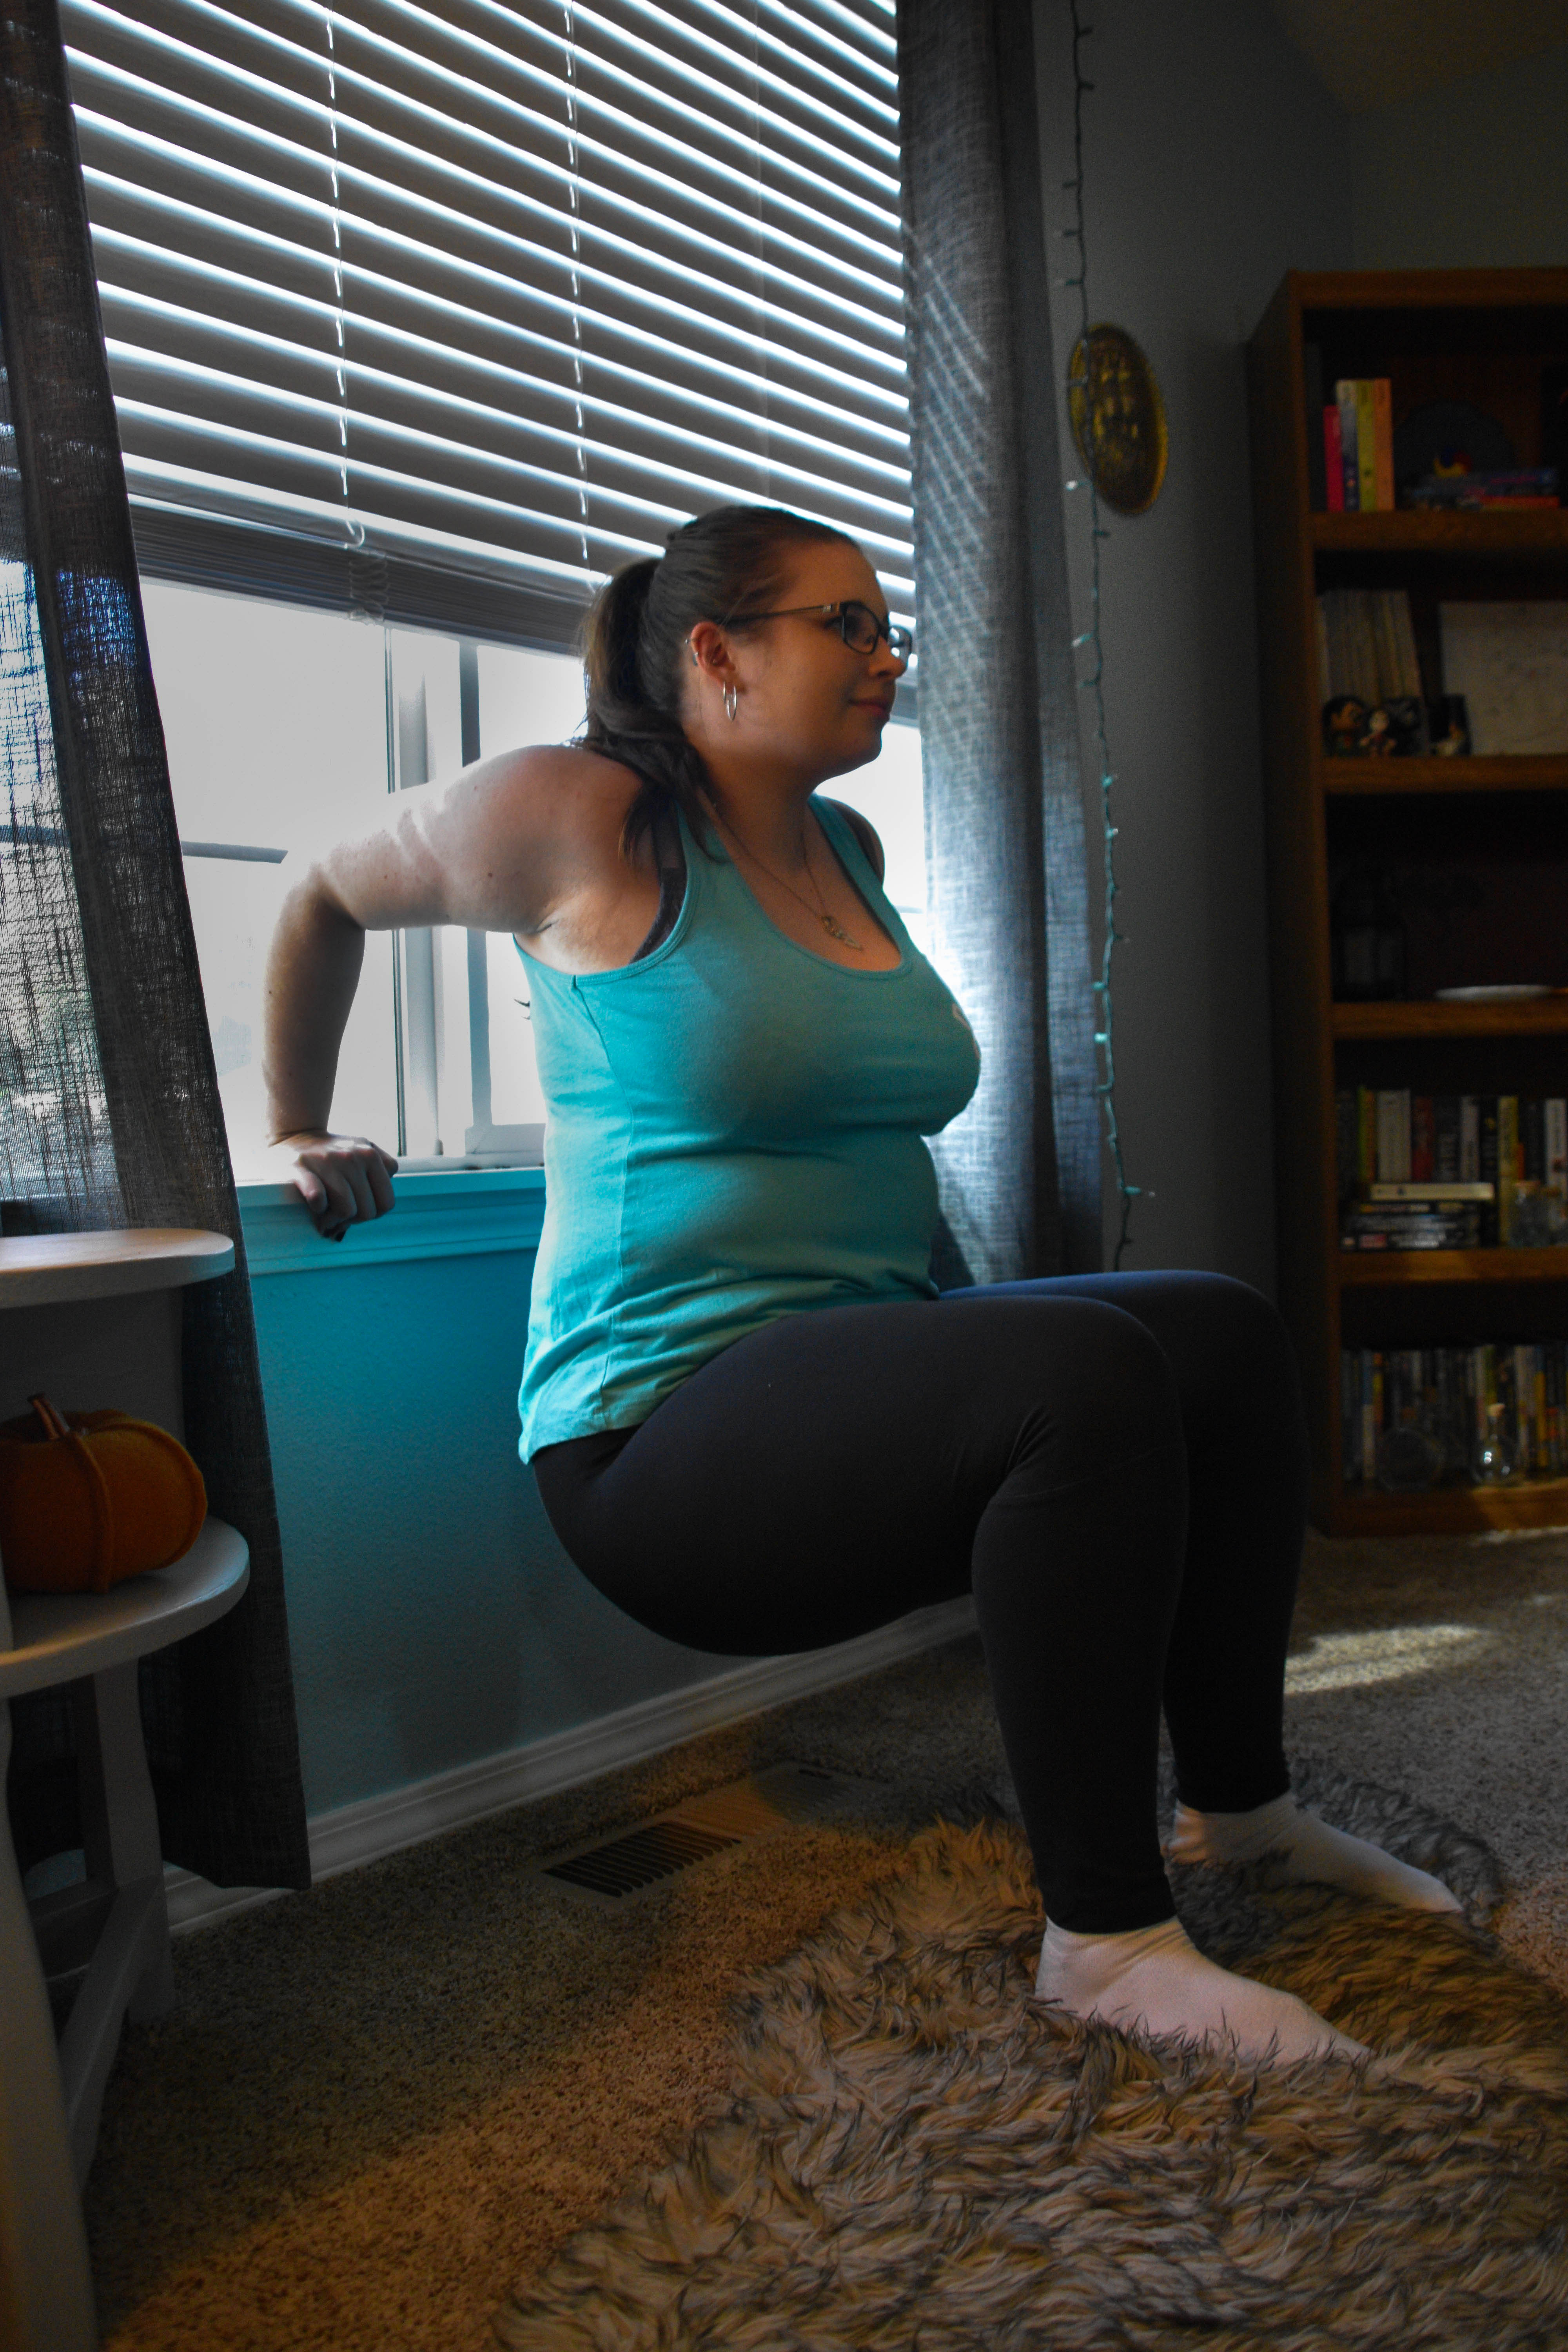
For an arm muscle workout, try tricep dips using a chair, coffee table or bed. Facing away from the object, place palms on the edge of the surface with feet flat on the floor. Lower down until arms are at 90º angles, then rise back up. Aim for three sets of 8–10 reps. Stack a textbook on the thighs to add some additional weight.

Mountain climbers are also a great exercise that works out many parts of the body, especially the core. Start in a plank position, then bring one knee forward to chest and tap toes to the ground while maintaining a flat back. Quickly switch the positions of the feet to complete one rep. Do 15–25 reps at a time, or perform as many as possible in one minute. 

With any exercise, remember to warm up and cool down. Always rest and modify movements or reps as needed. 

Contact the author at avanderzanden19@mail.wou.edu
Pumpkin bread recipe to fall for

Fall in love with this pumpkin bread recipe

Allison Vanderzanden | Lifestyle Editor

There are few things better than a warm baked good fresh out of the oven, especially as the weather begins to cool. To celebrate the start of fall and embrace the new season, try this moist pumpkin bread recipe with a sweet chocolate addition.

CHOCOLATE CHIP PUMPKIN BREAD

Start to finish: 1 hour 15 minutes

Servings: 1 loaf

1 ¾ cups all-purpose flour

1 teaspoon baking soda

2 teaspoons ground cinnamon

1 teaspoon pumpkin pie spice

¾ teaspoon table salt

2 large eggs, at room temperature

¾ cup granulated sugar

½ cup packed brown sugar

1 ½ cups pumpkin puree (canned or fresh)

½ cup vegetable oil, canola oil or melted coconut oil

¼ cup orange juice (milk can substitute)

⅔ cup semi-sweet chocolate chips


HOMEMADE PUMPKIN PIE SPICE SUBSTITUTE

¼ teaspoon ground nutmeg

¼ teaspoon ground cloves

¼ teaspoon ground ginger


Adjust the oven rack to the lower third position and preheat the oven to 350ºF. Spray a 9×5-inch loaf pan with non-stick spray. Set aside.

In a large bowl, whisk the flour, baking soda, cinnamon, nutmeg, cloves, ginger and salt together until combined. In a medium bowl, whisk the eggs, granulated sugar and brown sugar together until combined. Whisk in the pumpkin, oil and orange juice. Pour these wet ingredients into the dry ingredients and gently mix together using a rubber spatula or wooden spoon. There will be a few lumps. Do not overmix. Gently fold in the chocolate chips.

Pour the batter into the prepared loaf pan. Bake for 60–65 minutes, and loosely cover the bread with aluminum foil halfway through to prevent the top from getting too brown. The bread is done when a toothpick inserted in the center comes out clean with only a few small moist crumbs; begin checking every five minutes at the 55 minute mark.

Allow the bread to cool completely in the pan on a wire rack before removing and slicing. Cover and store leftover bread at room temperature for 3–4 days or in the refrigerator for up to about 10 days.

Recipe from sallysbakingaddiction.com

Contact the author at avanderzanden19@mail.wou.edu